High-Capacity Slim Wallet

Overview
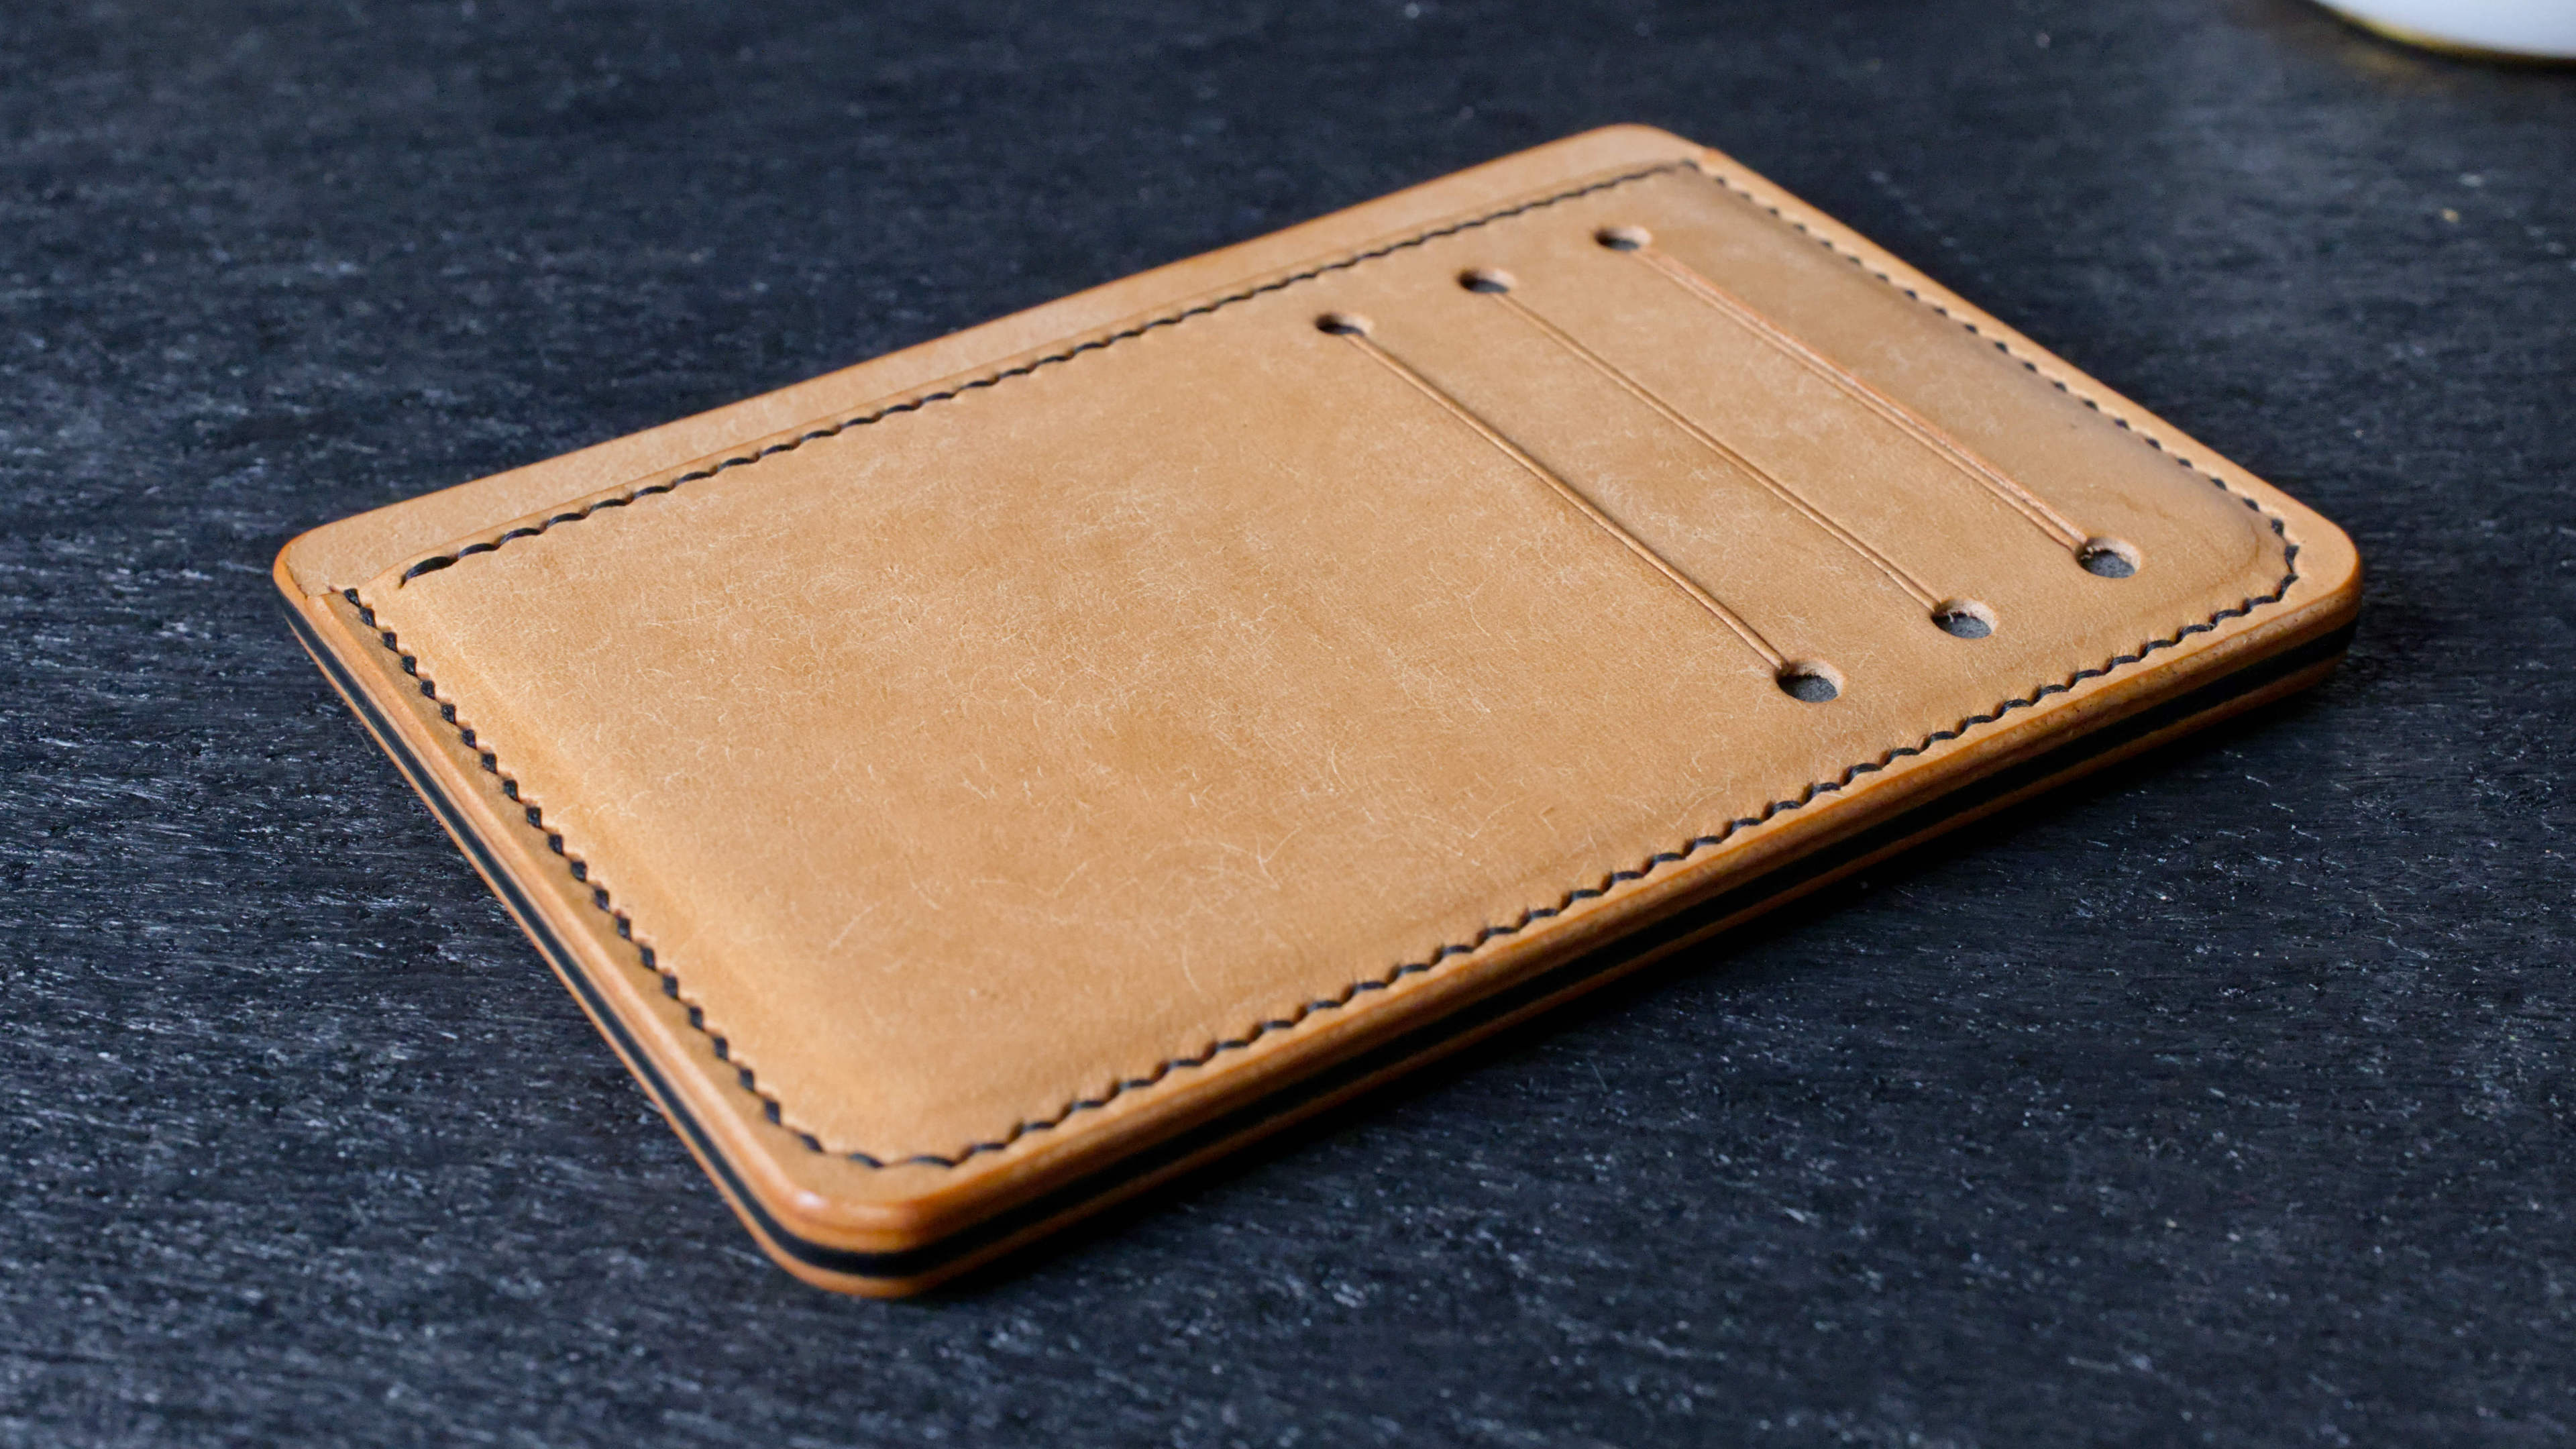
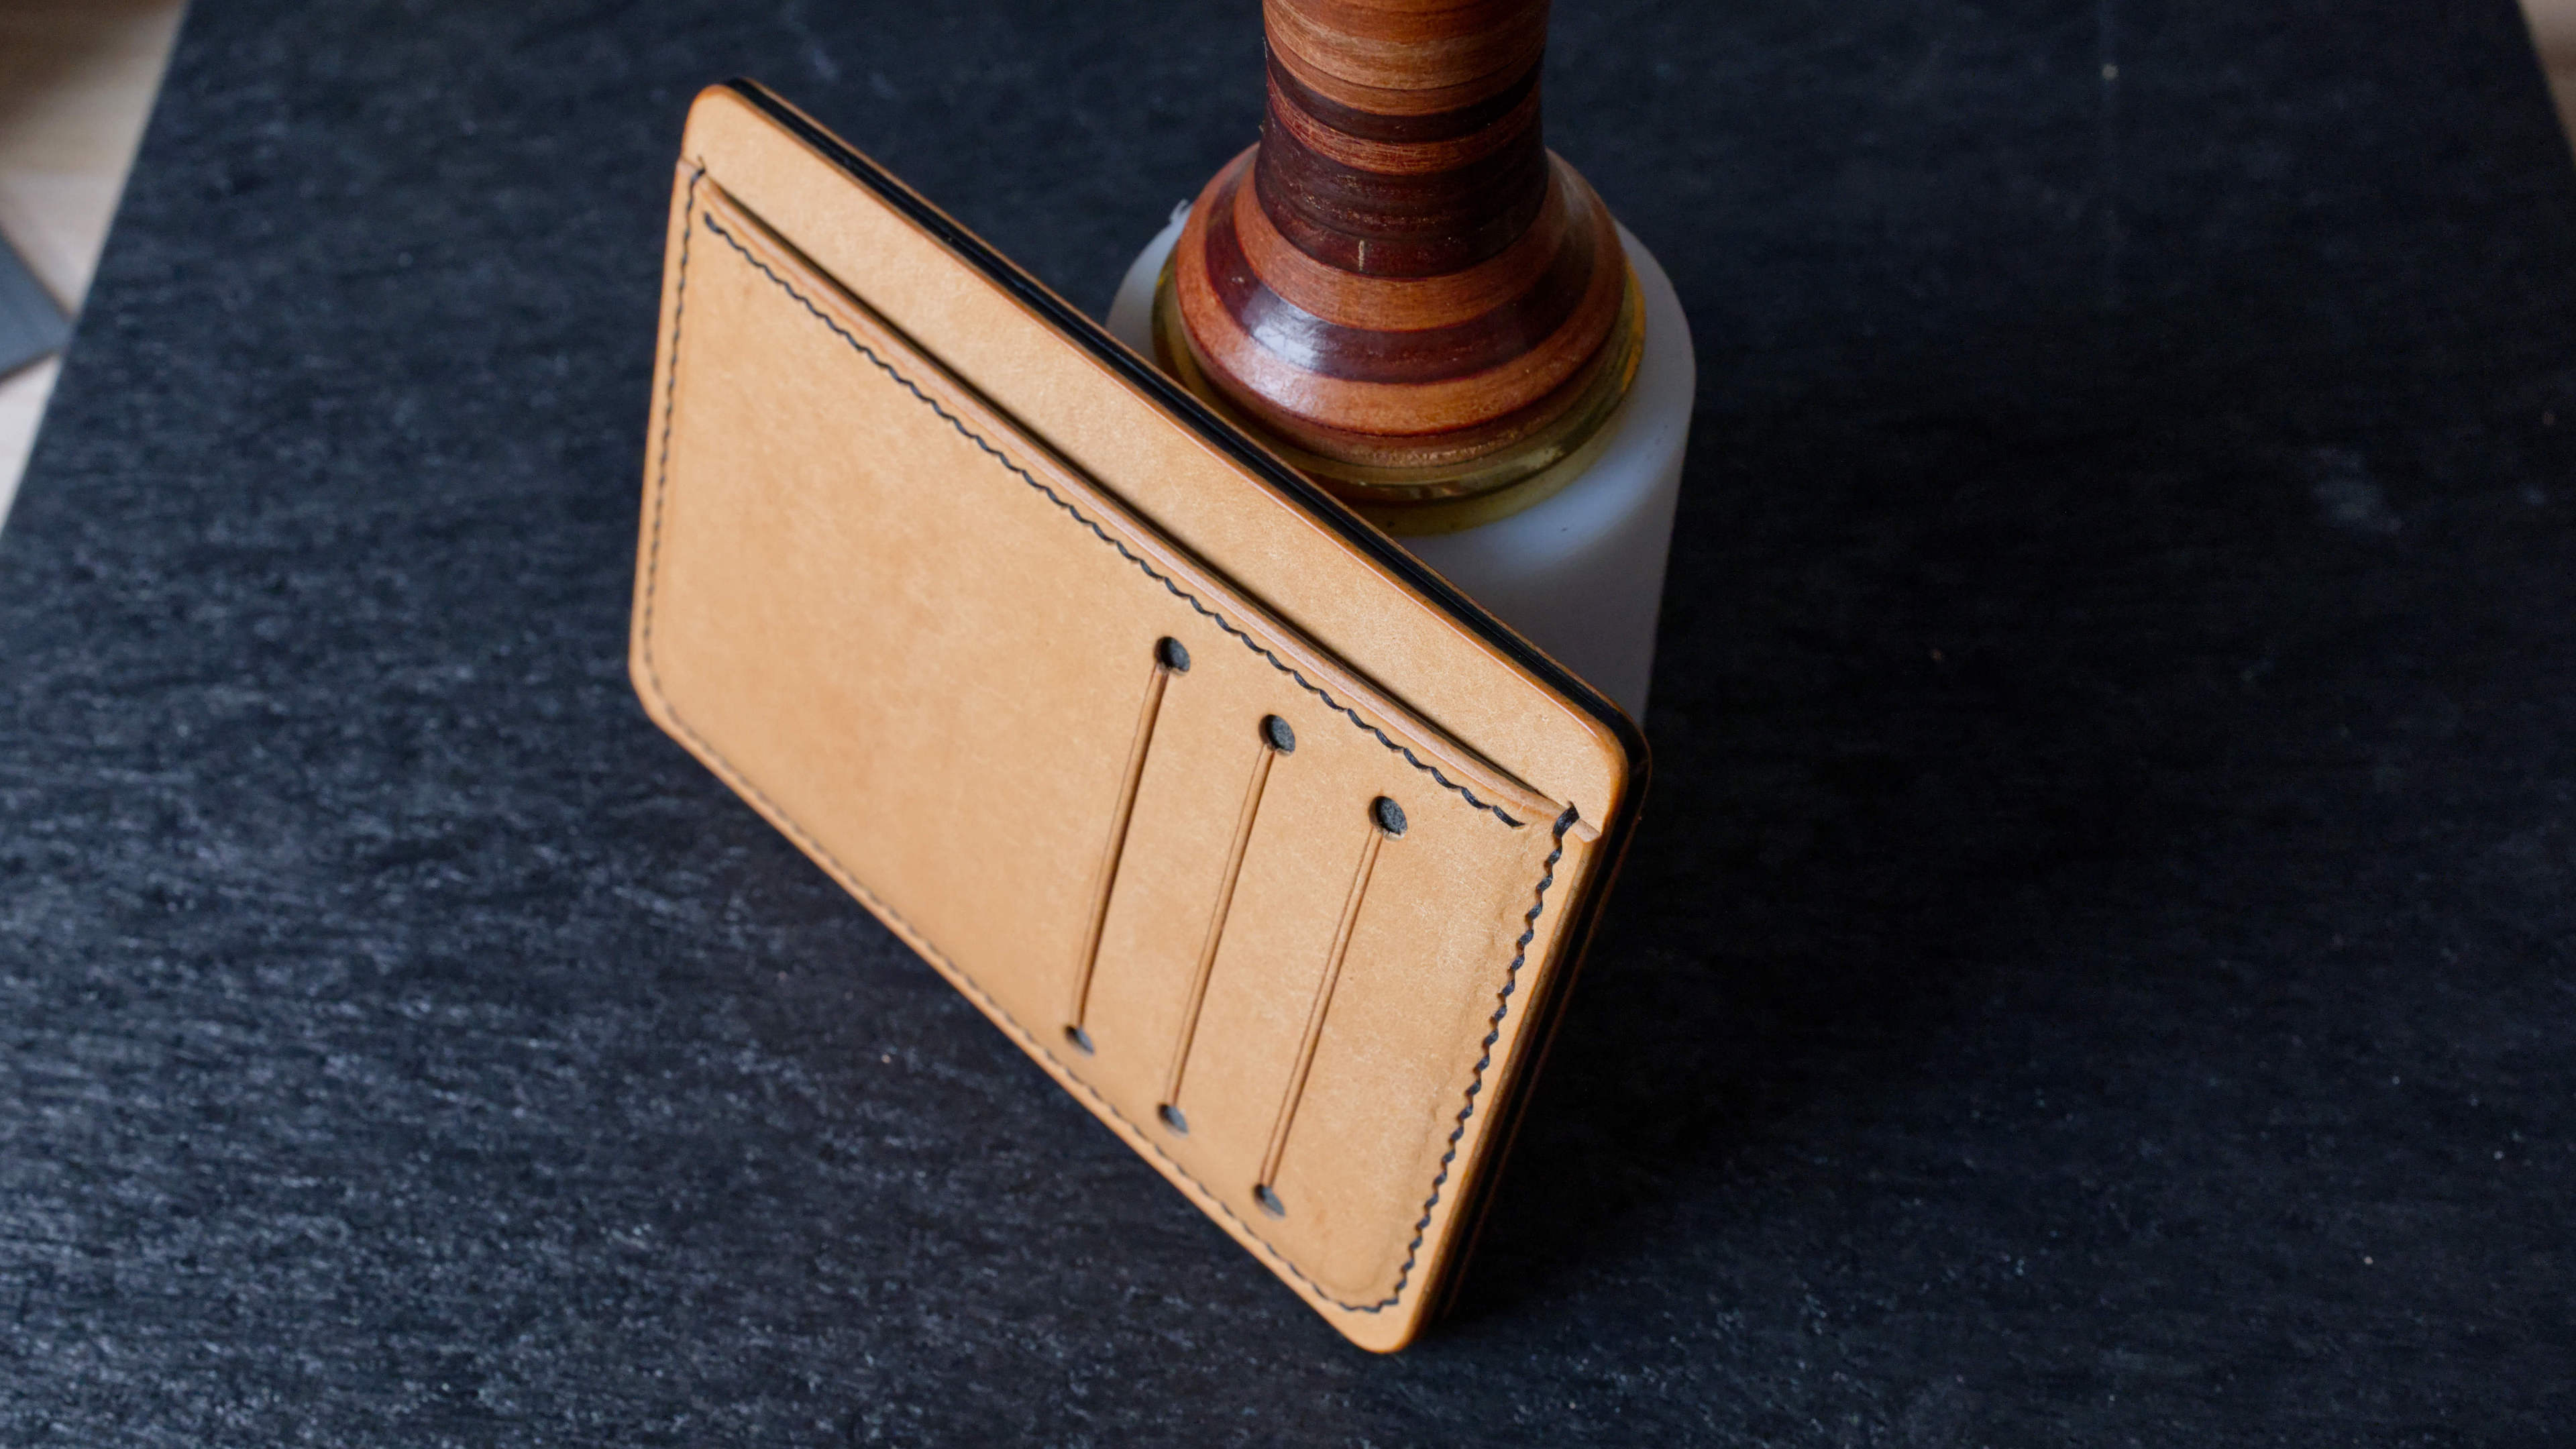
The High-Capacity Slim Wallet has six standard card slots, two large pockets, and a cash pocket. I've been using an early draft of this wallet for about 3 years, carrying a few bills and 8-10 cards with no issues.
The cash pocket is large enough to fit bills from most currencies, but any cash must be folded in half to fit into the pocket.
This page documents the process I use to make this wallet and can serve as a tutorial for those with basic competency in leather-crafting (it focuses on what to do, not how to do it). If you intend to recreate this project, I recommend reading through the entire page before beginning.
I have provided a list of all tools and materials used for this project. Specific recommendations for tools or brands come with a justification, but most of these can be swapped with your tool/material of choice. All tools and materials came from Rocky Mountain Leather Supply, Tandy Leather, and Weaver Leather Supply.
Downloads
Tools and Materials
- Leather
- I used Pueblo leather with 3.0 oz. splitting (1.2mm thickness). This is too thick—use 1.0mm thick leather. Any thin and stiff leather will work, but if you choose Pueblo, the colors will darken over time. Those shown here are Natural and Black.
- Outlining Tools
- Printer and paper for stencil
- Ruler
- Cutting/Punching Tools
- Knife or blade of choice for making straight cuts
- Hole punch with diameter between 2-5mm
- Knife, blade, or punch for cutting rounded corners
- Ruler or other straight edge
- Cutting and/or punching mat
- Glue/Cement
- Glue(s) and glue tape of choice
- Glue spreader
- Folder/Creaser tool
- Clamps
- Stitching
- Pricking irons and/or stitching awl (with mallet if necessary)—I used 3.38mm pricking irons (2- and 12-teeth) with a stitching awl.
- Thread—any bonded polyester thread with ~0.6mm thickness will work. I am using Ritza 25 Polyester "Tiger" Thread.
- Needles
- Stitching pony
- Lighter
- Finishing
- Burnisher
- Edger/Beveler
- Canvas
- High-grit sandpaper (1000, 2000, and 3000)
- Tokonol
- Other
- Pocket lining—I have used both ribbon and Tyvek with good results. Tyvek is thinner, easier to work with, and just as durable as ribbon. However, ribbon gives a more premium look. If you use ribbon, remove any wire/lining that increases edge thickness.
Step 1: Prepare stencil
Download and print the stencil (A4 Stencil, US Letter Stencil).
Verify the scale is correct by measuring the 1-inch x 1-inch (or 3-cm x 3-cm) squares on each page.
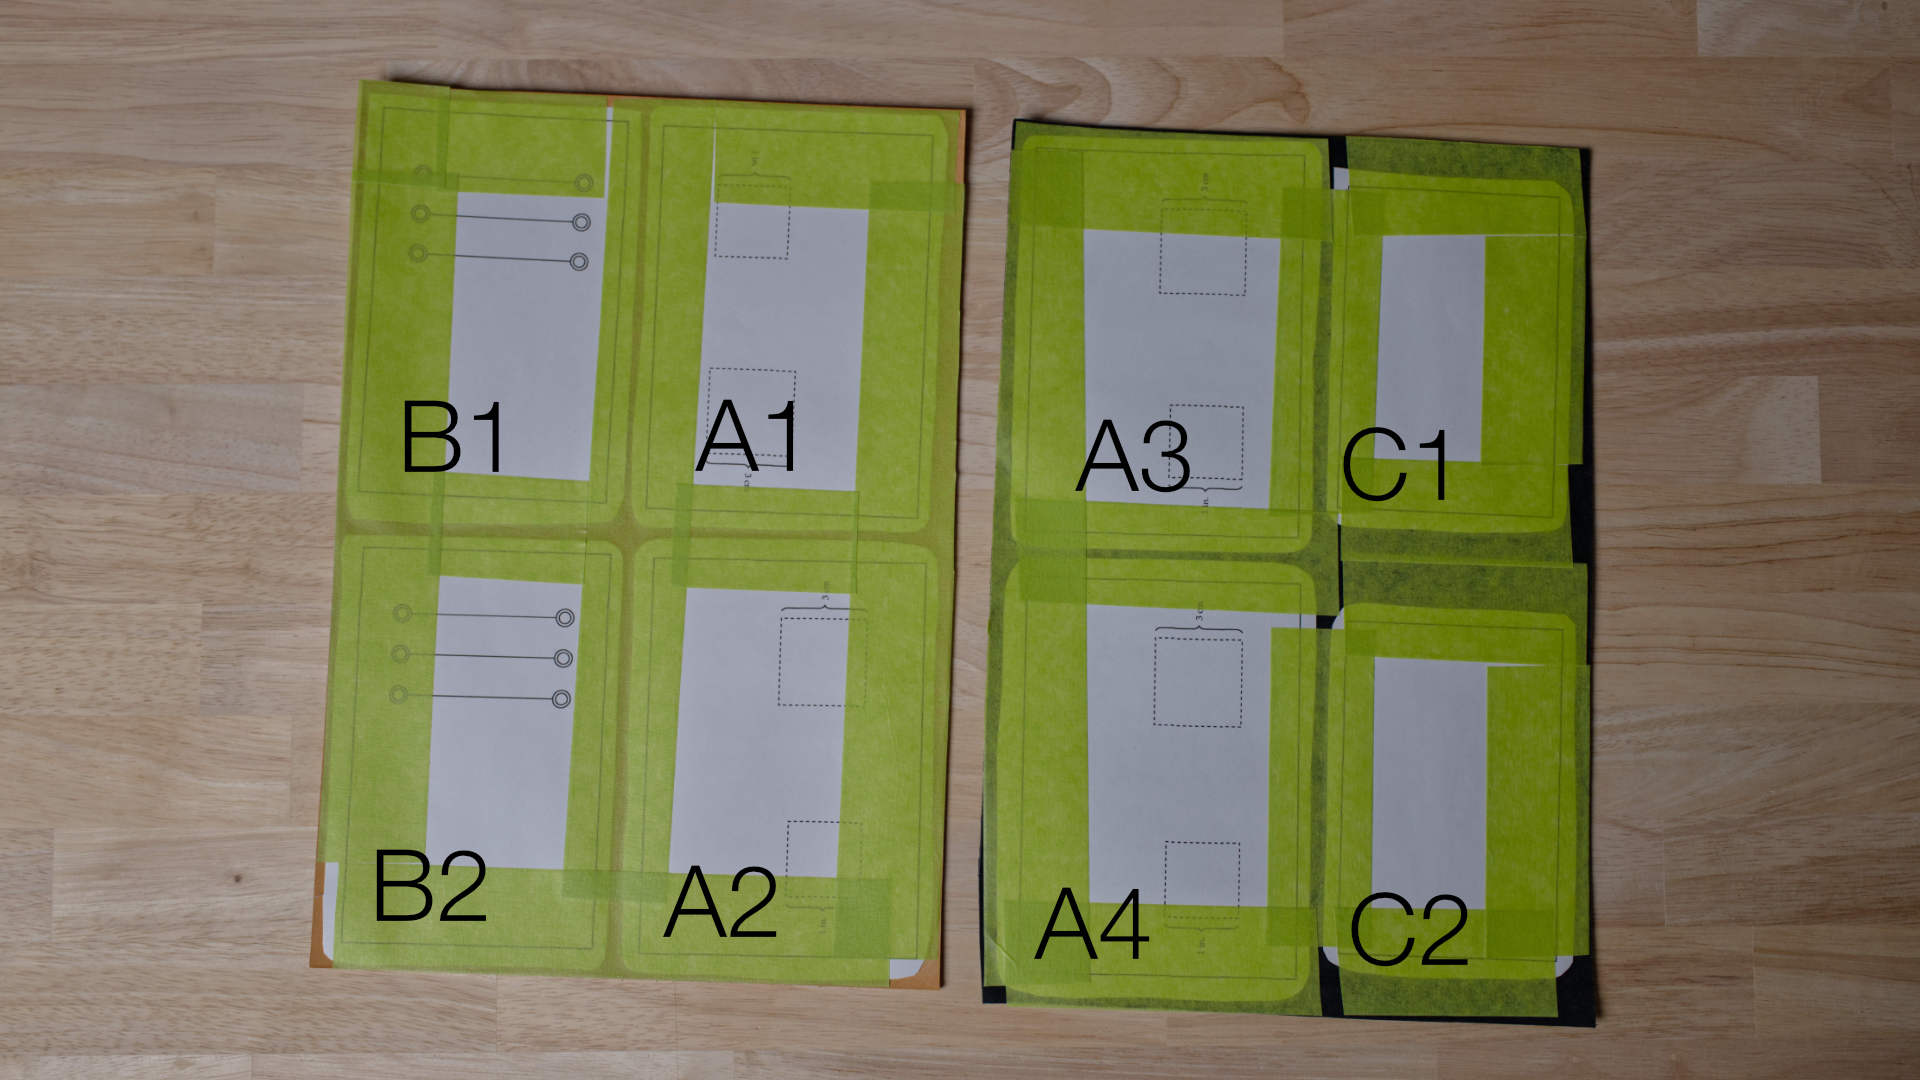
Using masking tape (or something similarly translucent/transparent), tape the rough-cut stencil shapes to the leather.
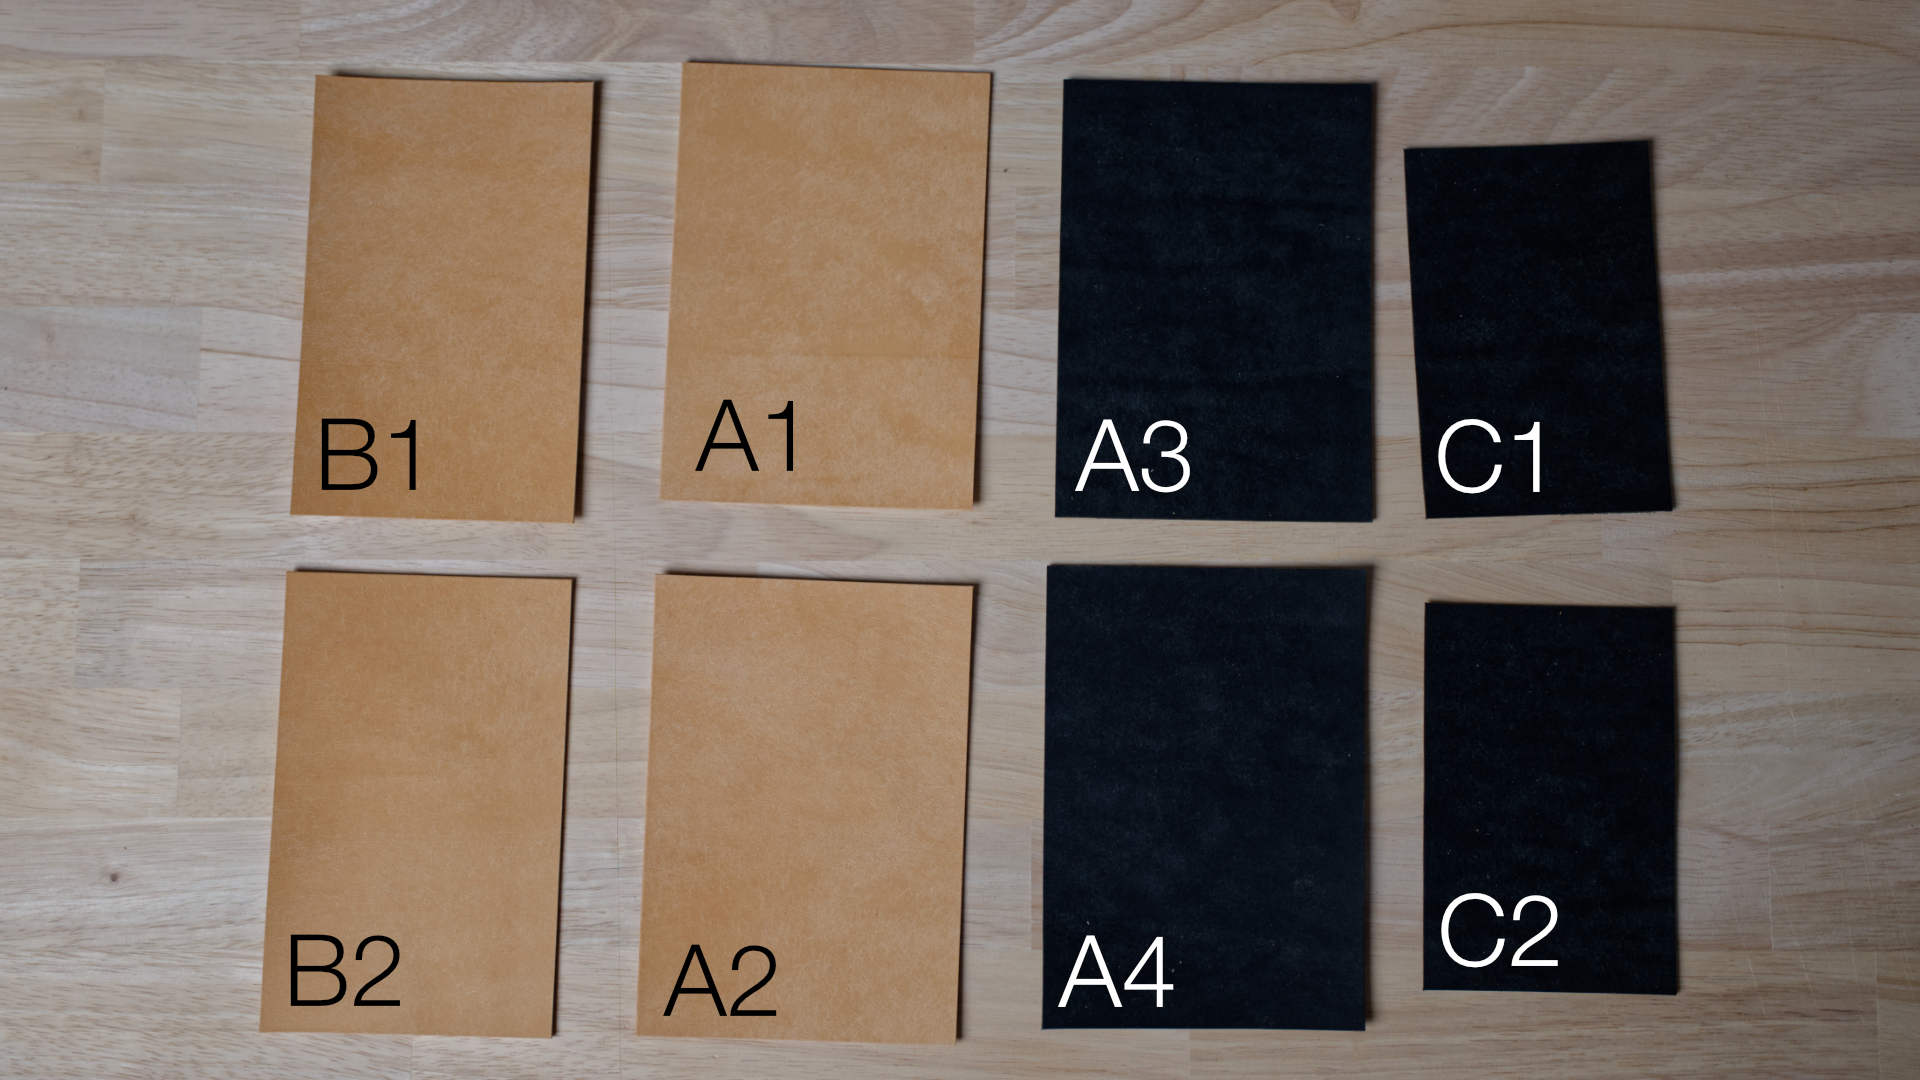
If you are using two colors of leather, shapes A1, A2, B1, and B2 should be the primary color. Shapes A3, A4, C1, and C2 should be taped to the contrasting color.
Step 2: Cut the leather panels
Use a straight edge aligned with the stencil outlines to cut the panels.
You should have 2 unused shapes from the stencil (we'll use these in the next step).
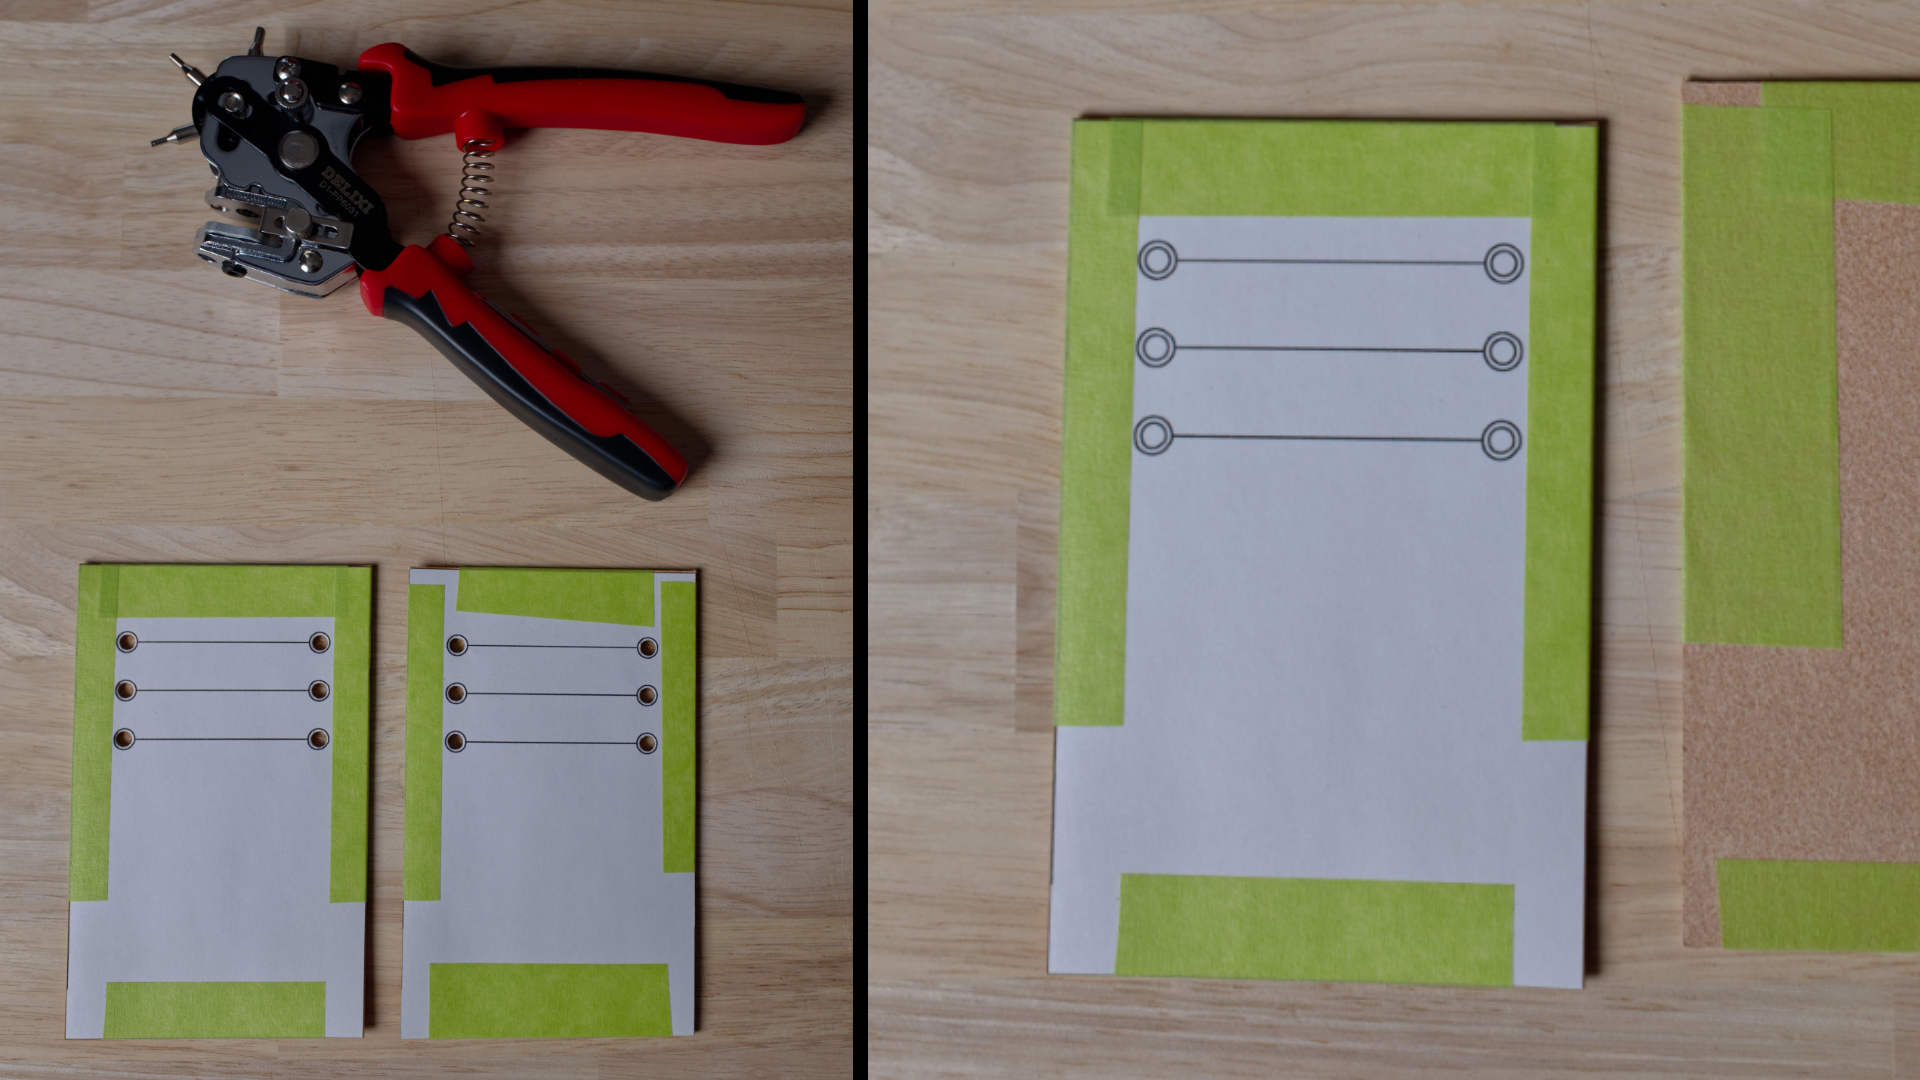
Step 3: Punch holes for card slots
Tape stencil pieces B3/B4 to the B1/B2 leather panels. Align a hole punch to the circles on the stencil and punch six holes.
The size of the holes is not too important. Their primary purpose is to prevent the card slot from splitting farther than we want. I have found that 4-5mm diameter holes to be aesthetically pleasing, but you may go bigger or smaller without risk.
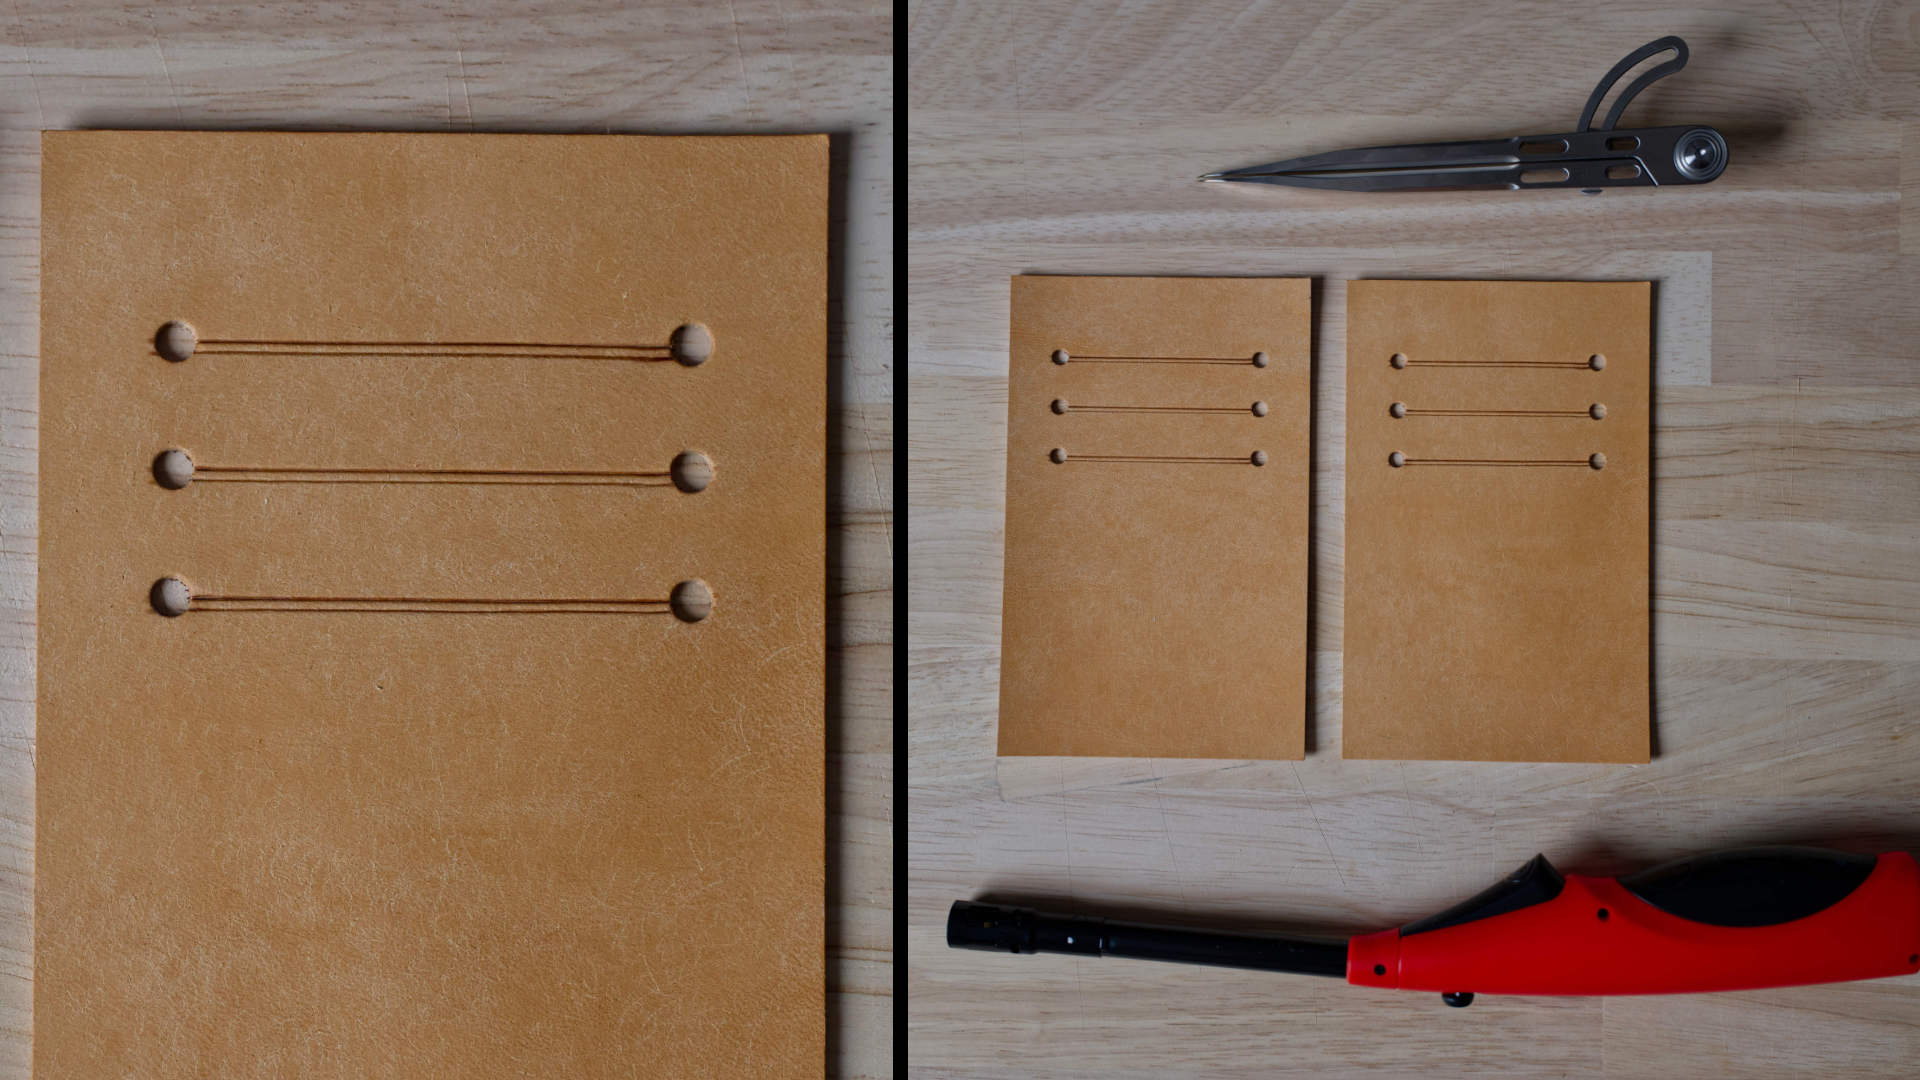
Step 4: Cut card slots
With the stencil still attached, cut the card slots connecting the holes.
You can use a lighter to burn off any frayed edges where the hole meets the card slot.
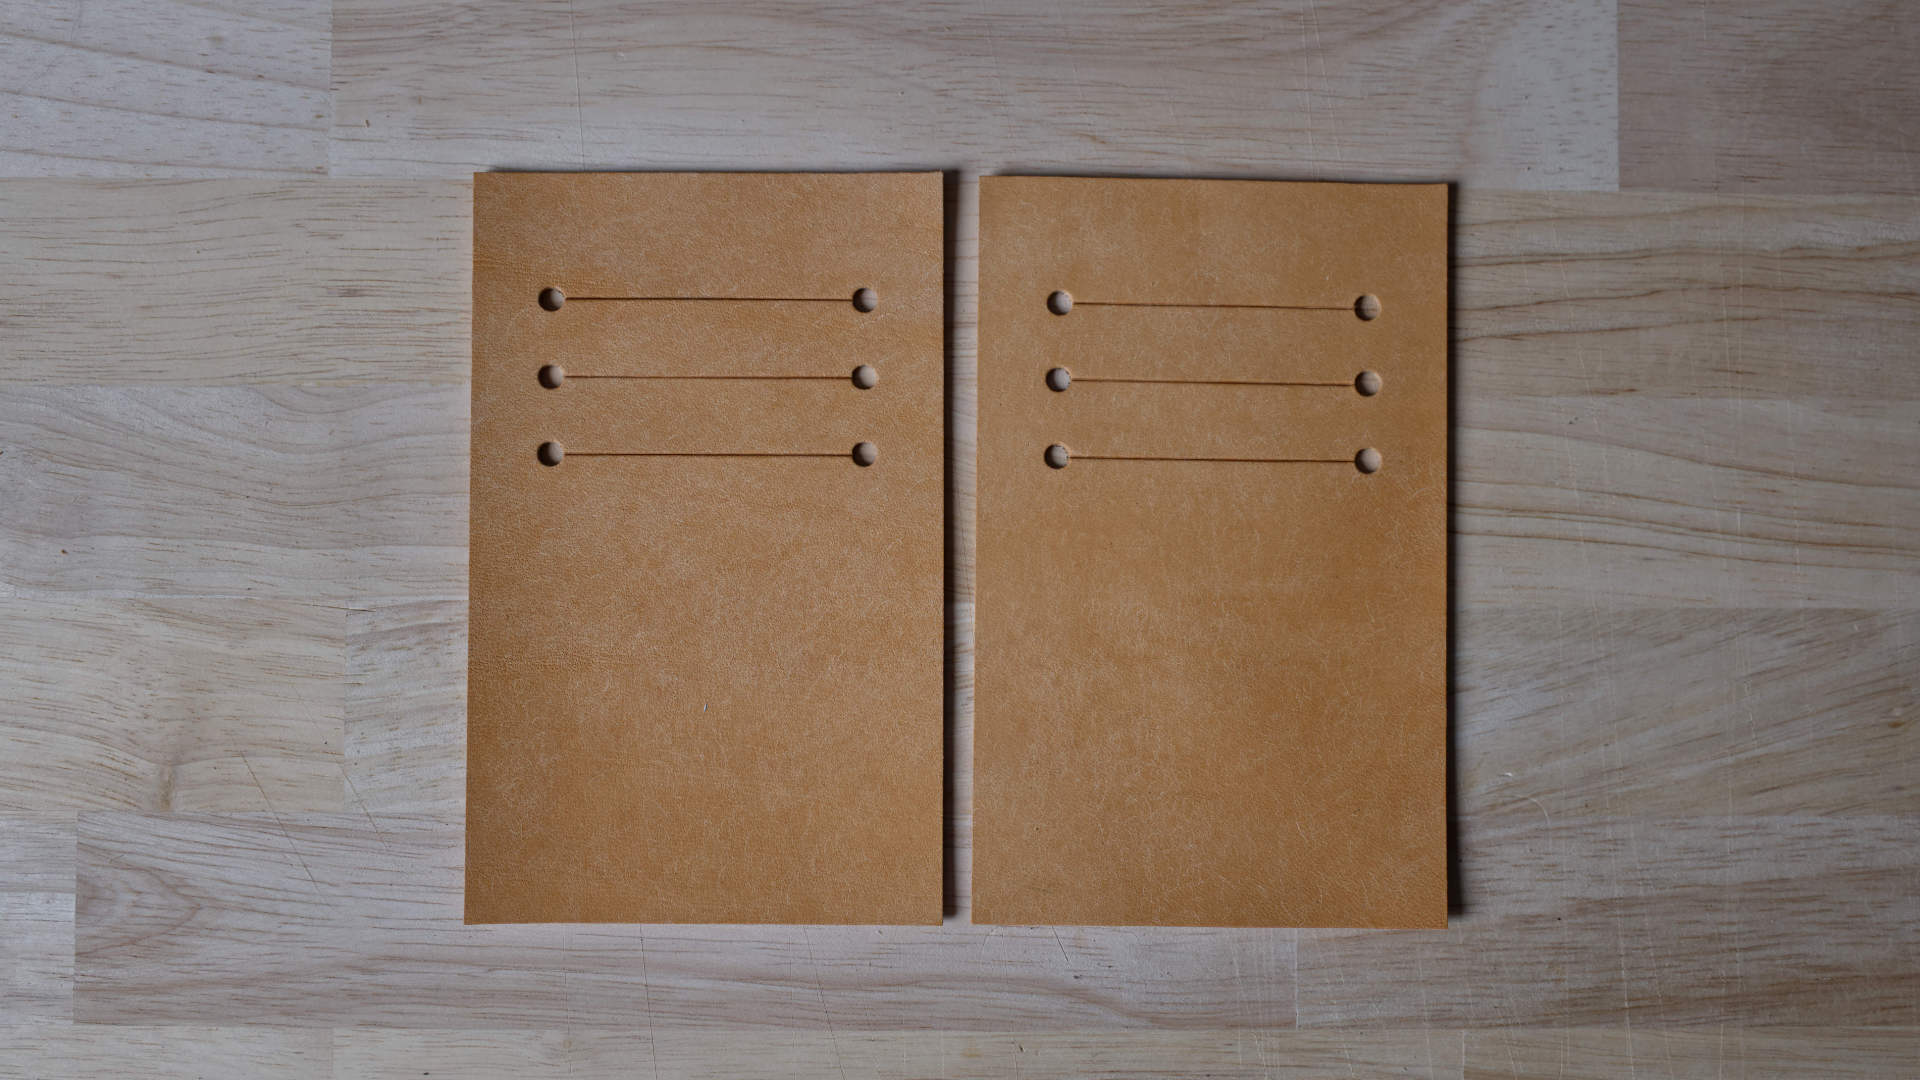
Step 5 (Optional): Crease the card slots
I like to use an edge creaser (heated by a lighter) to seal and crease the edges of the slots. It performs no real function other than improve (subjectively) aesthetics.
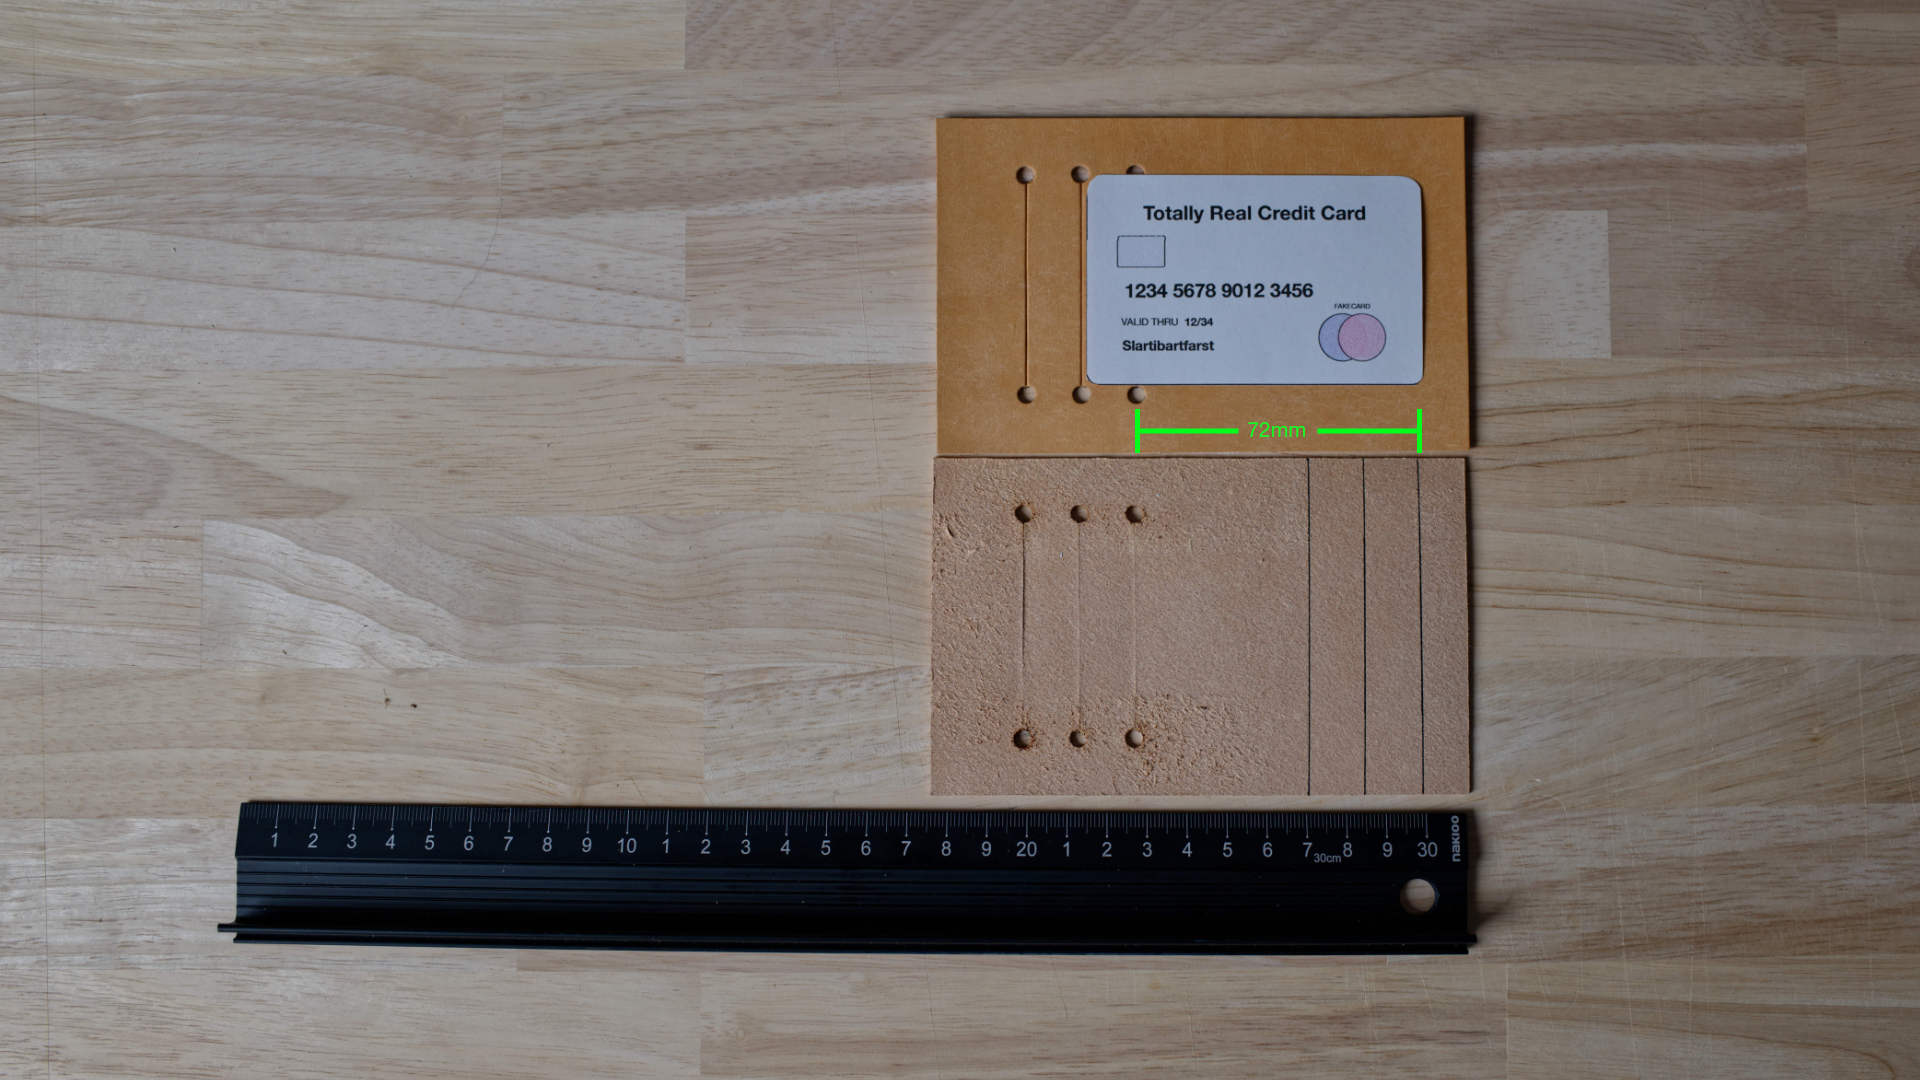
Step 6: Mark the pocket bottoms
Before using our ribbon (or Tyvek) to form the pockets, we need to mark where those pockets end.
A standard credit card is just under 86mm long. The pockets are separated by 14mm. The pockets should bottom out around 72mm below the card slot (so that ~14mm of each card sticks out of the pocket).
Use a ruler (or a credit card, ID, etc.) to draw lines on the back of the leather panel where the bottom of each pocket will be.
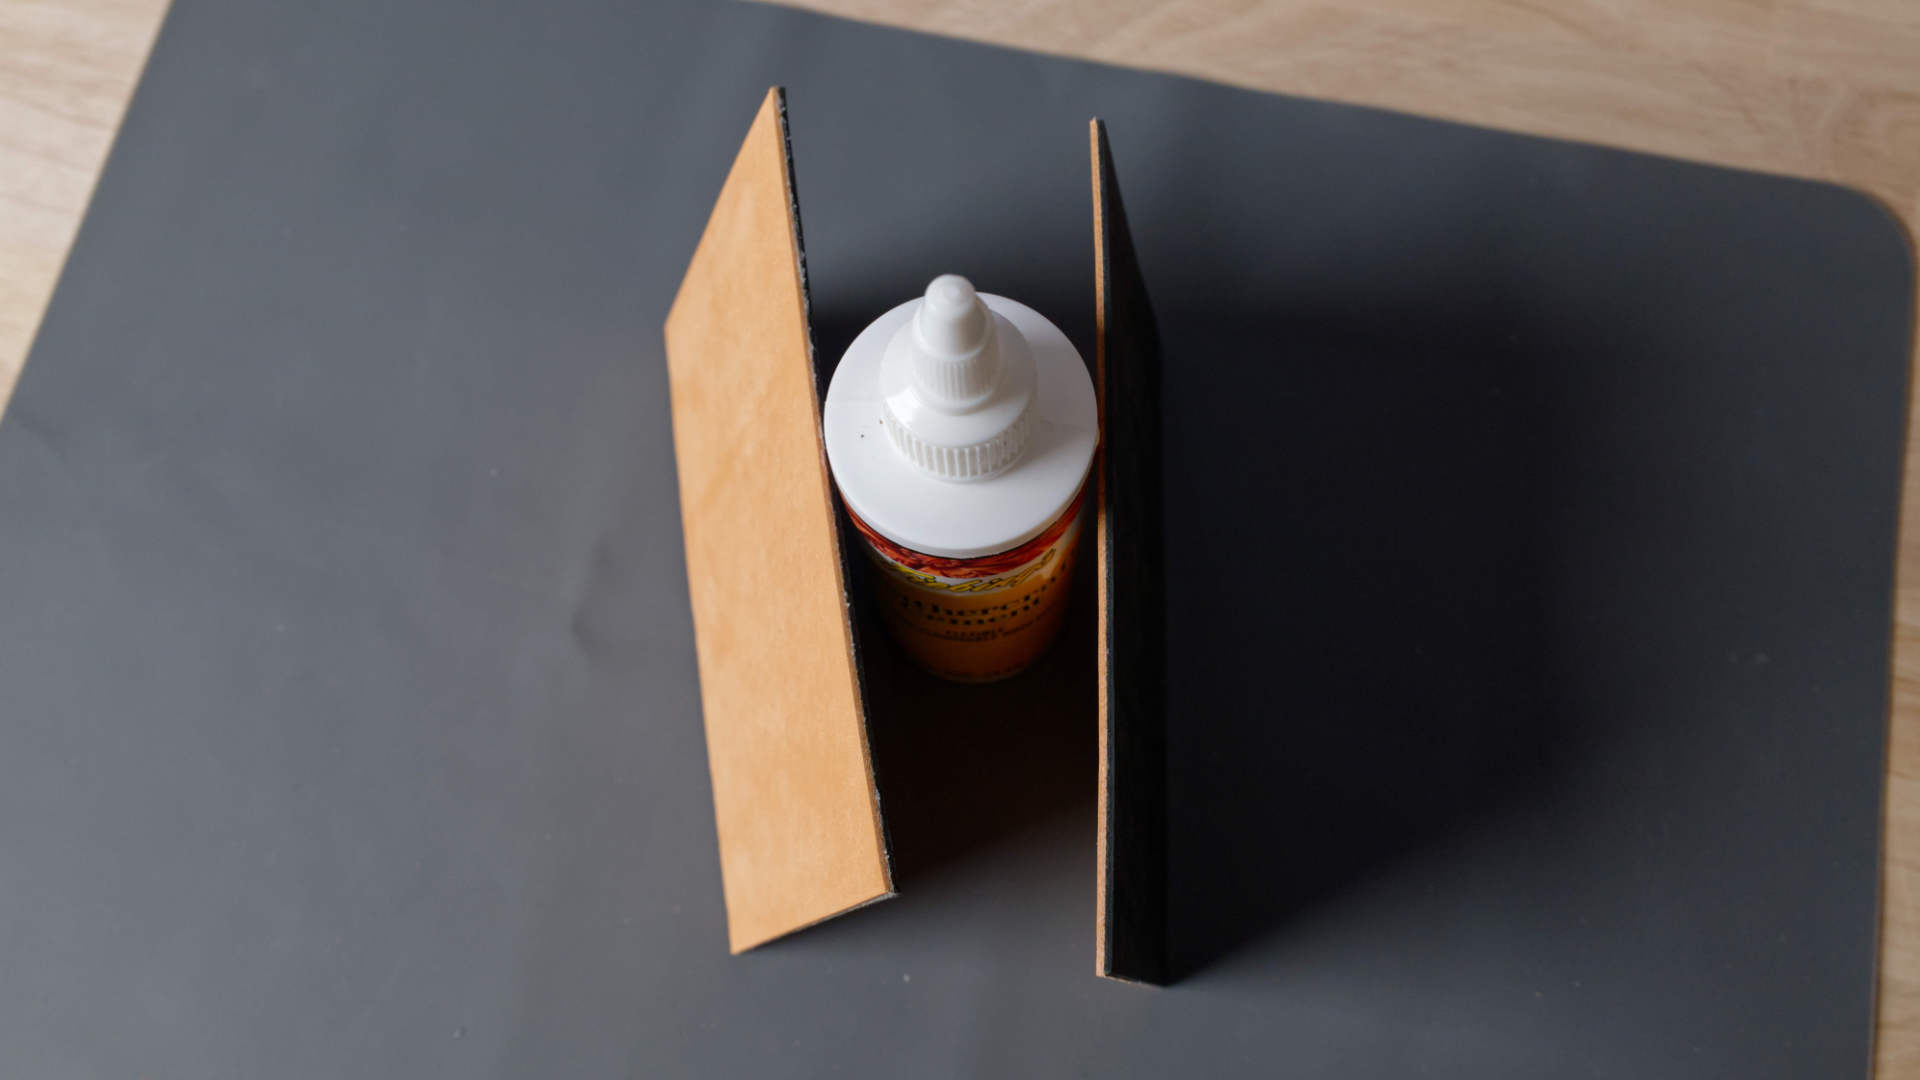
Step 7: Place glue tape for pockets
The next few steps will be much easier if you use adhesive tape rather than liquid/gel. Place a glue tape strip underneath each card slot, above the top card slot, and above the lowest card-bottom mark.
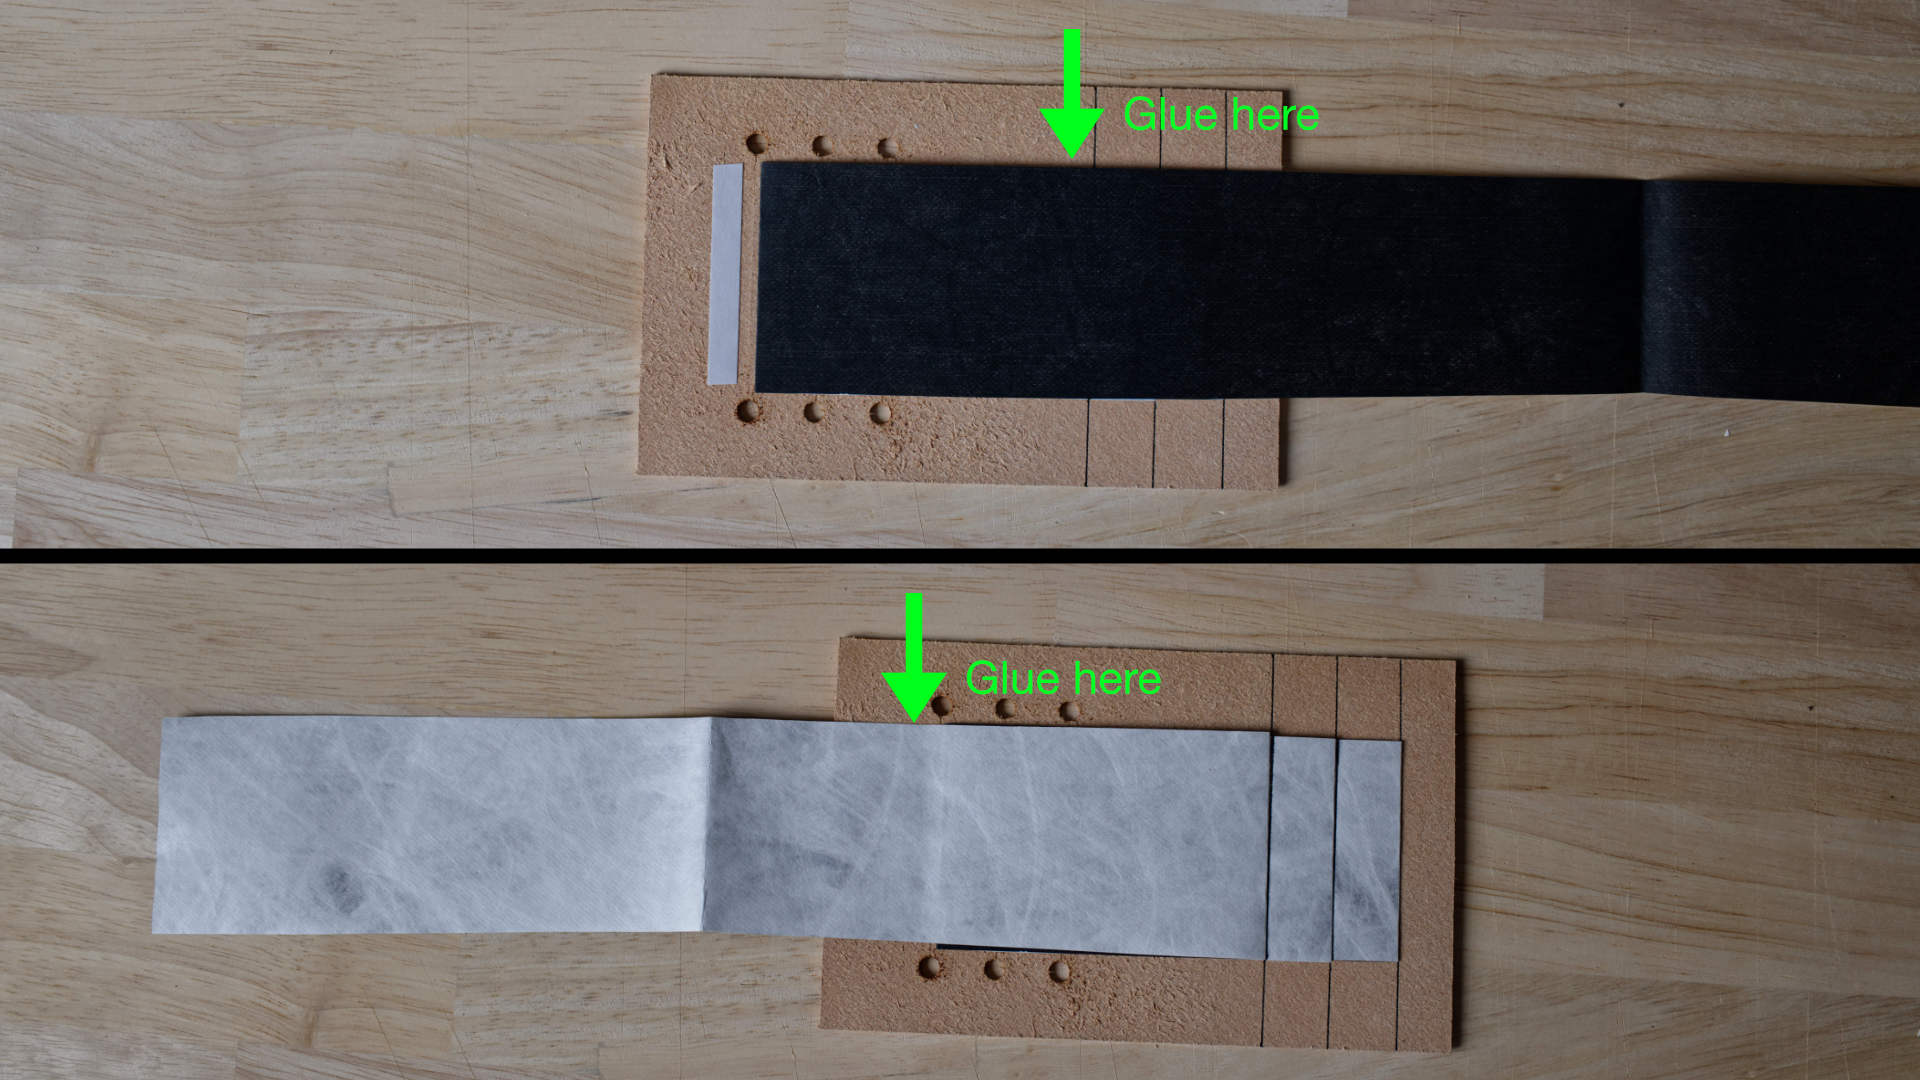
Step 8: Glue ribbon/Tyvek under first pocket
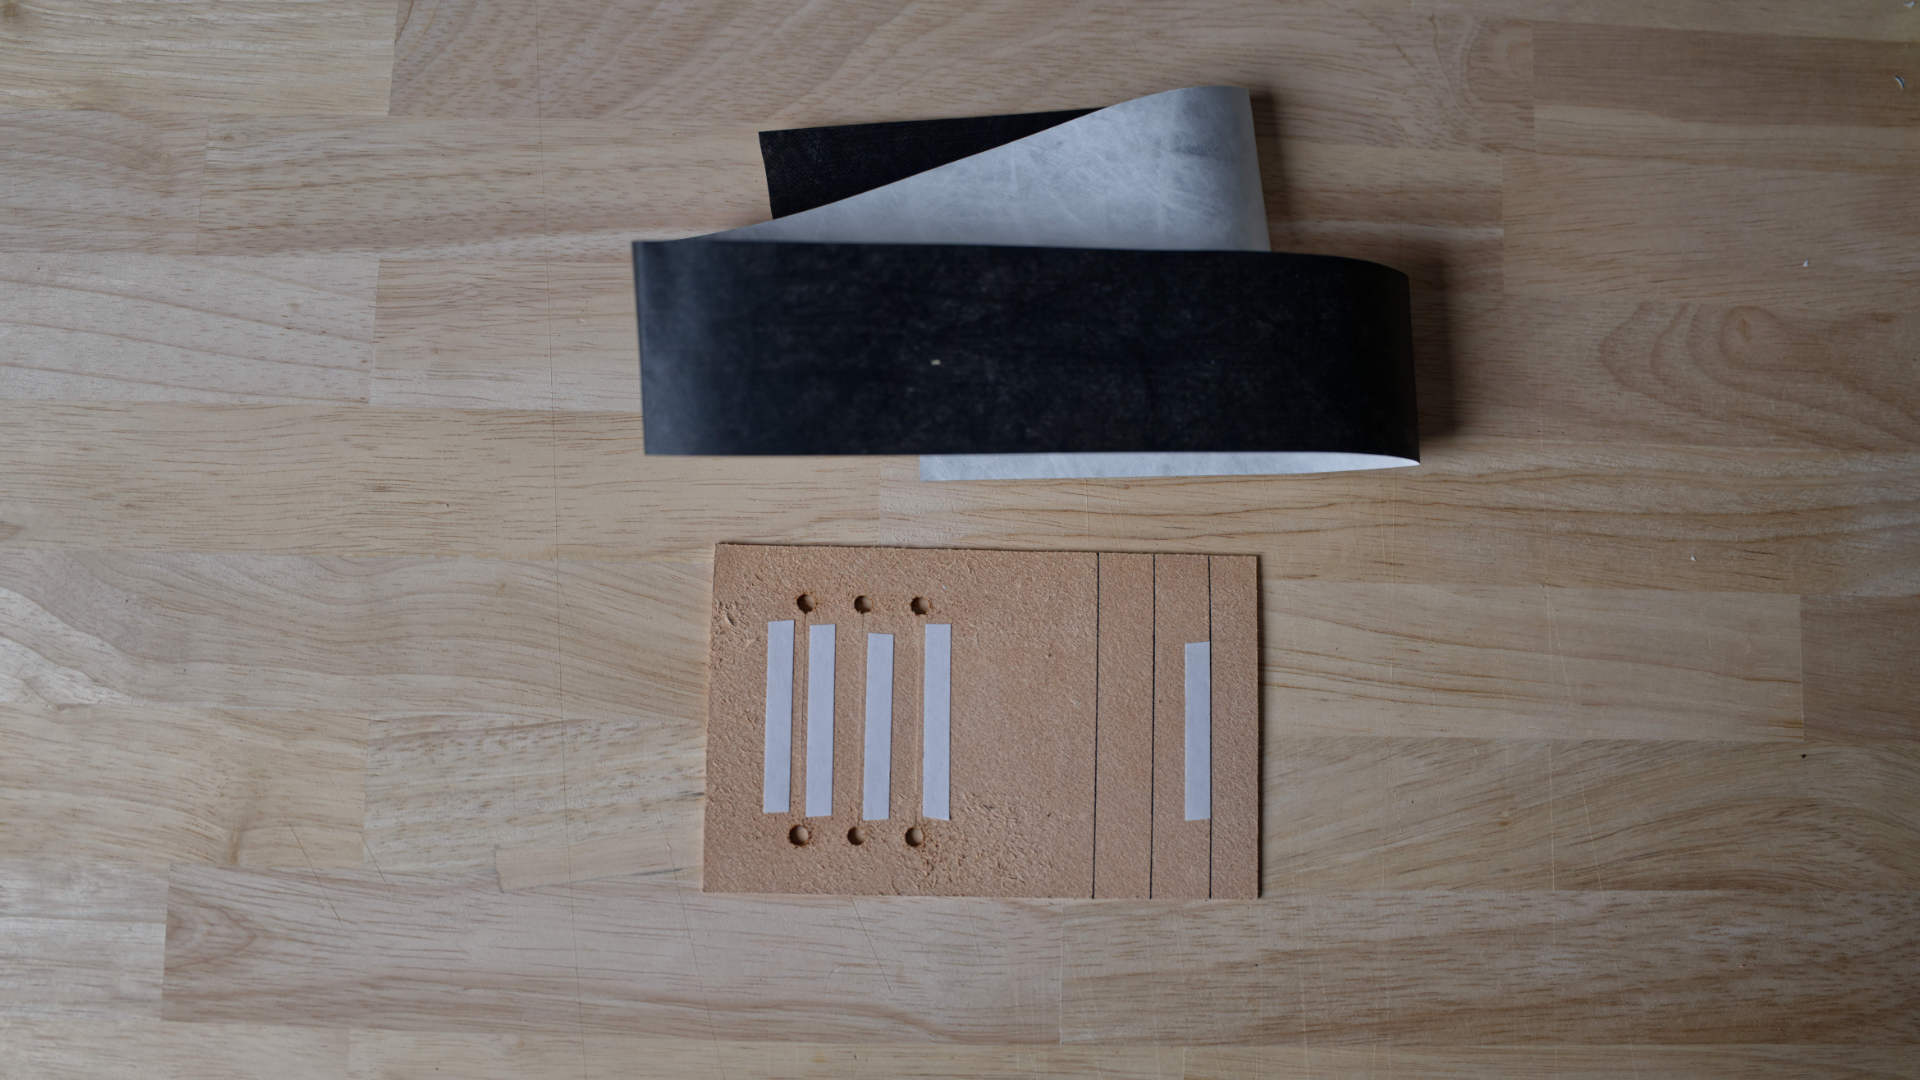
Be sure you have at least 50cm of Tyvek or ribbon to work with. If you order Tyvek from Tandy Leather (pictured here), you may need to trim the sides to ensure the strip is narrower than the card slot.
If you are using ribbon, there is no need to trim as long as the edges extend past the holes (so that the ribbon is visible through the holes) but not much further (we need room to glue and trim the leather edges).
Remove the wax paper from the adhesive strip underneath the lowest pocket and glue your pocket material as shown in the picture.
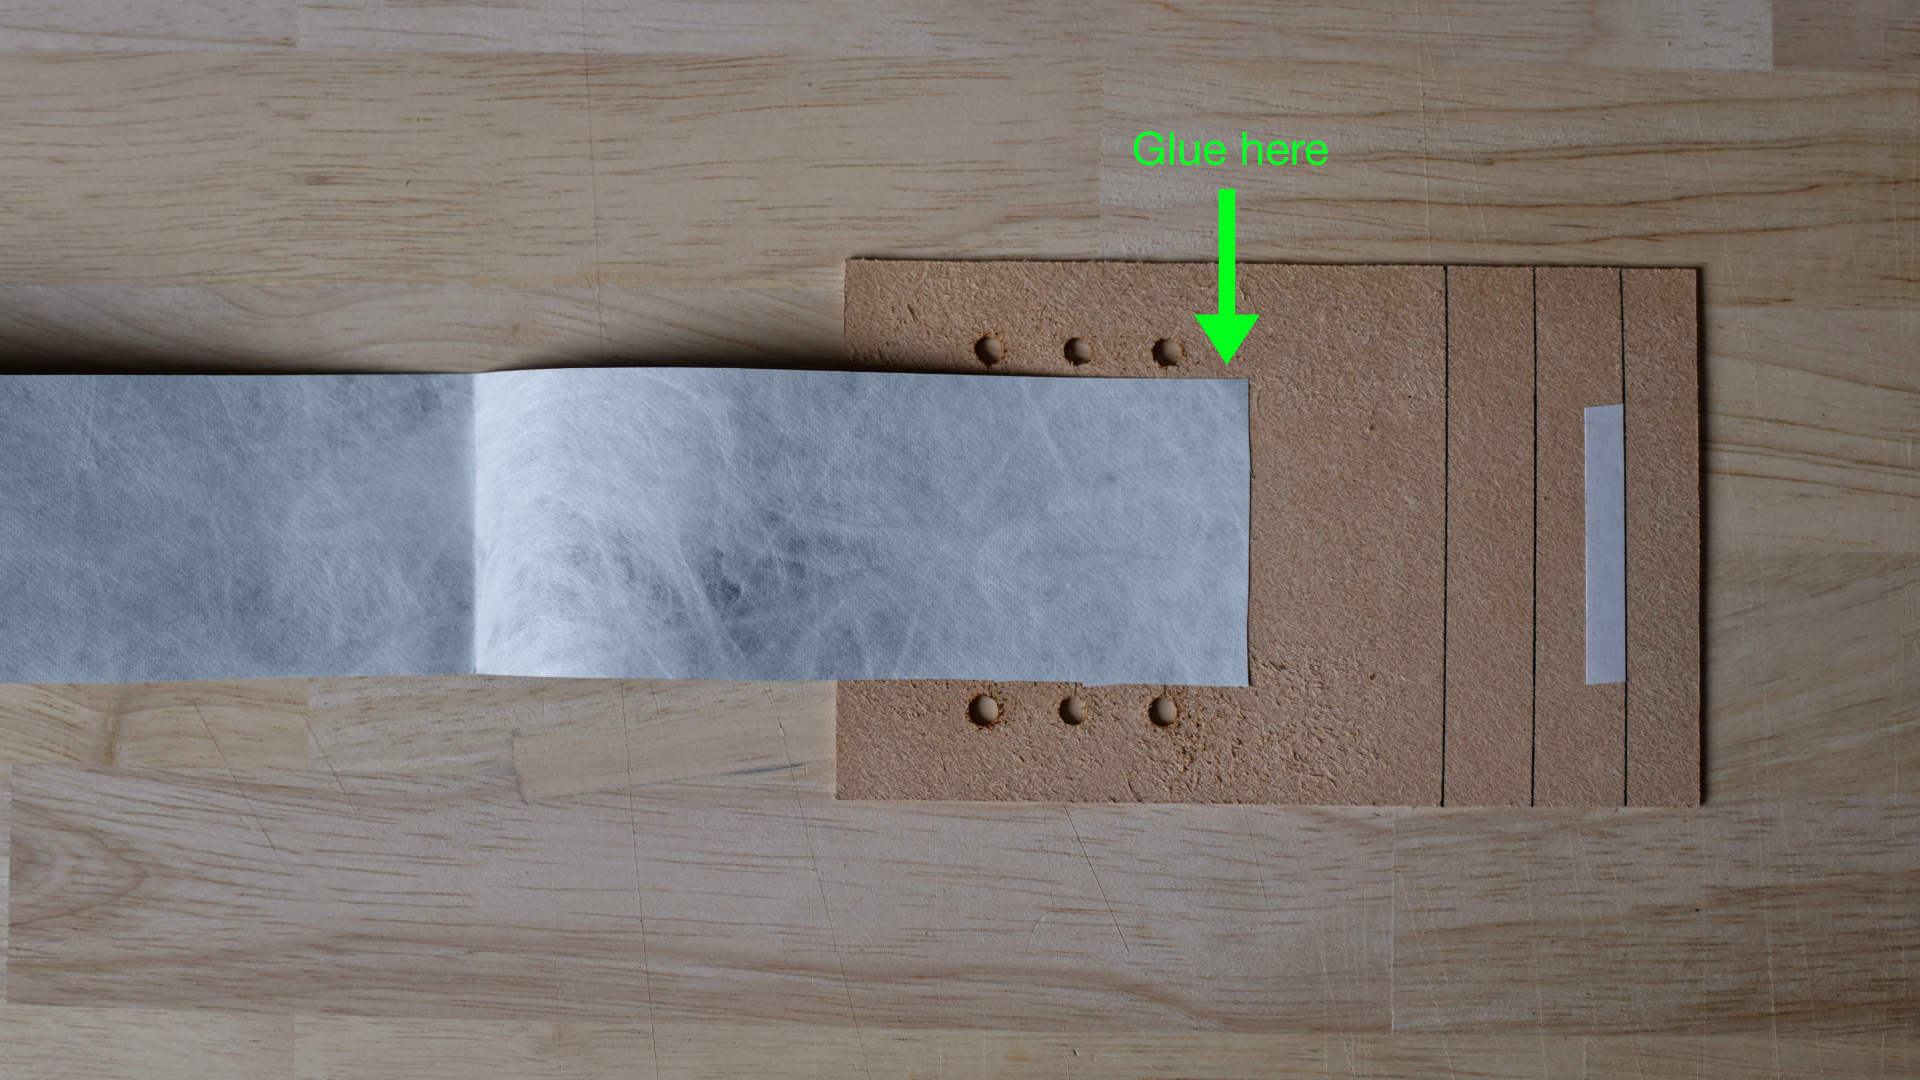
Step 9: Fold ribbon/Tyvek down
Fold the pocket material down and glue to the bottom of the lowest pocket.
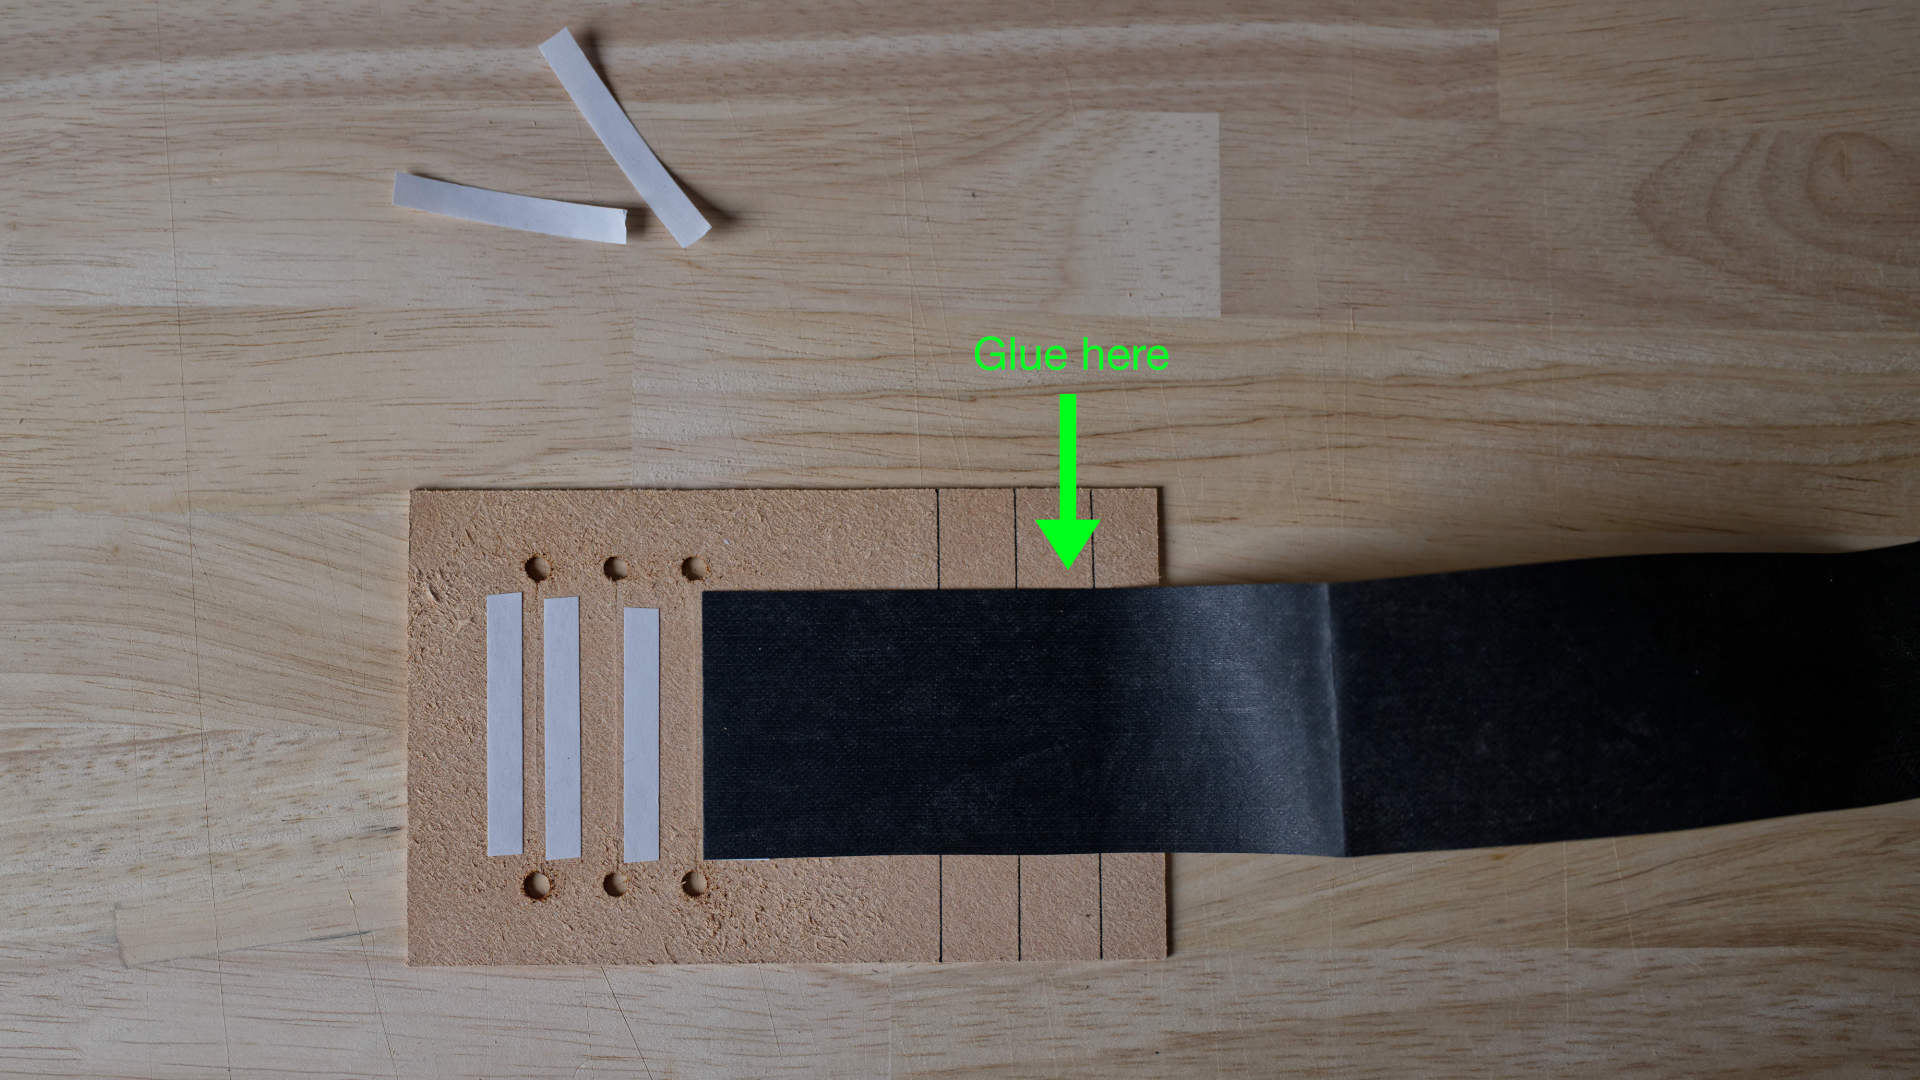
Step 10: Complete the first pocket
Fold the pocket material back up and glue to the bottom of the second pocket.
Add another adhesive strip in line with the second pocket bottom.
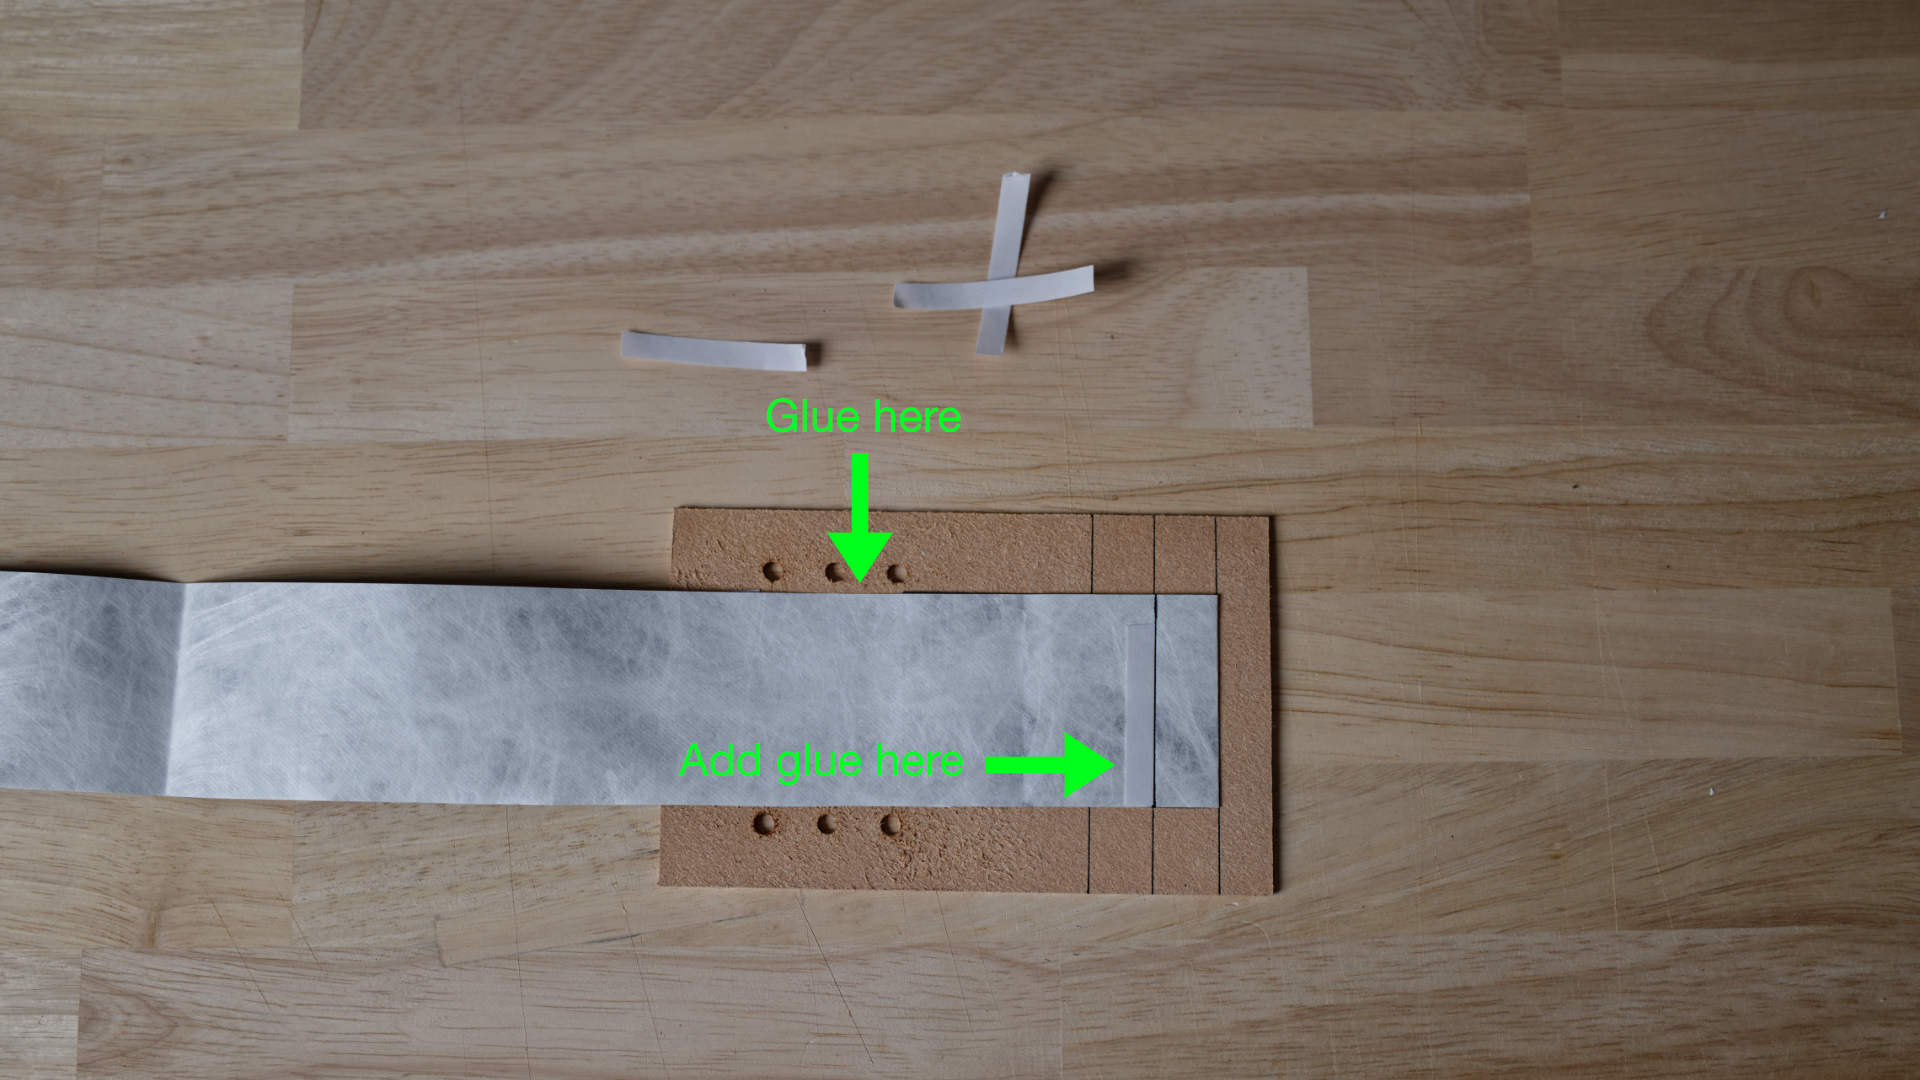
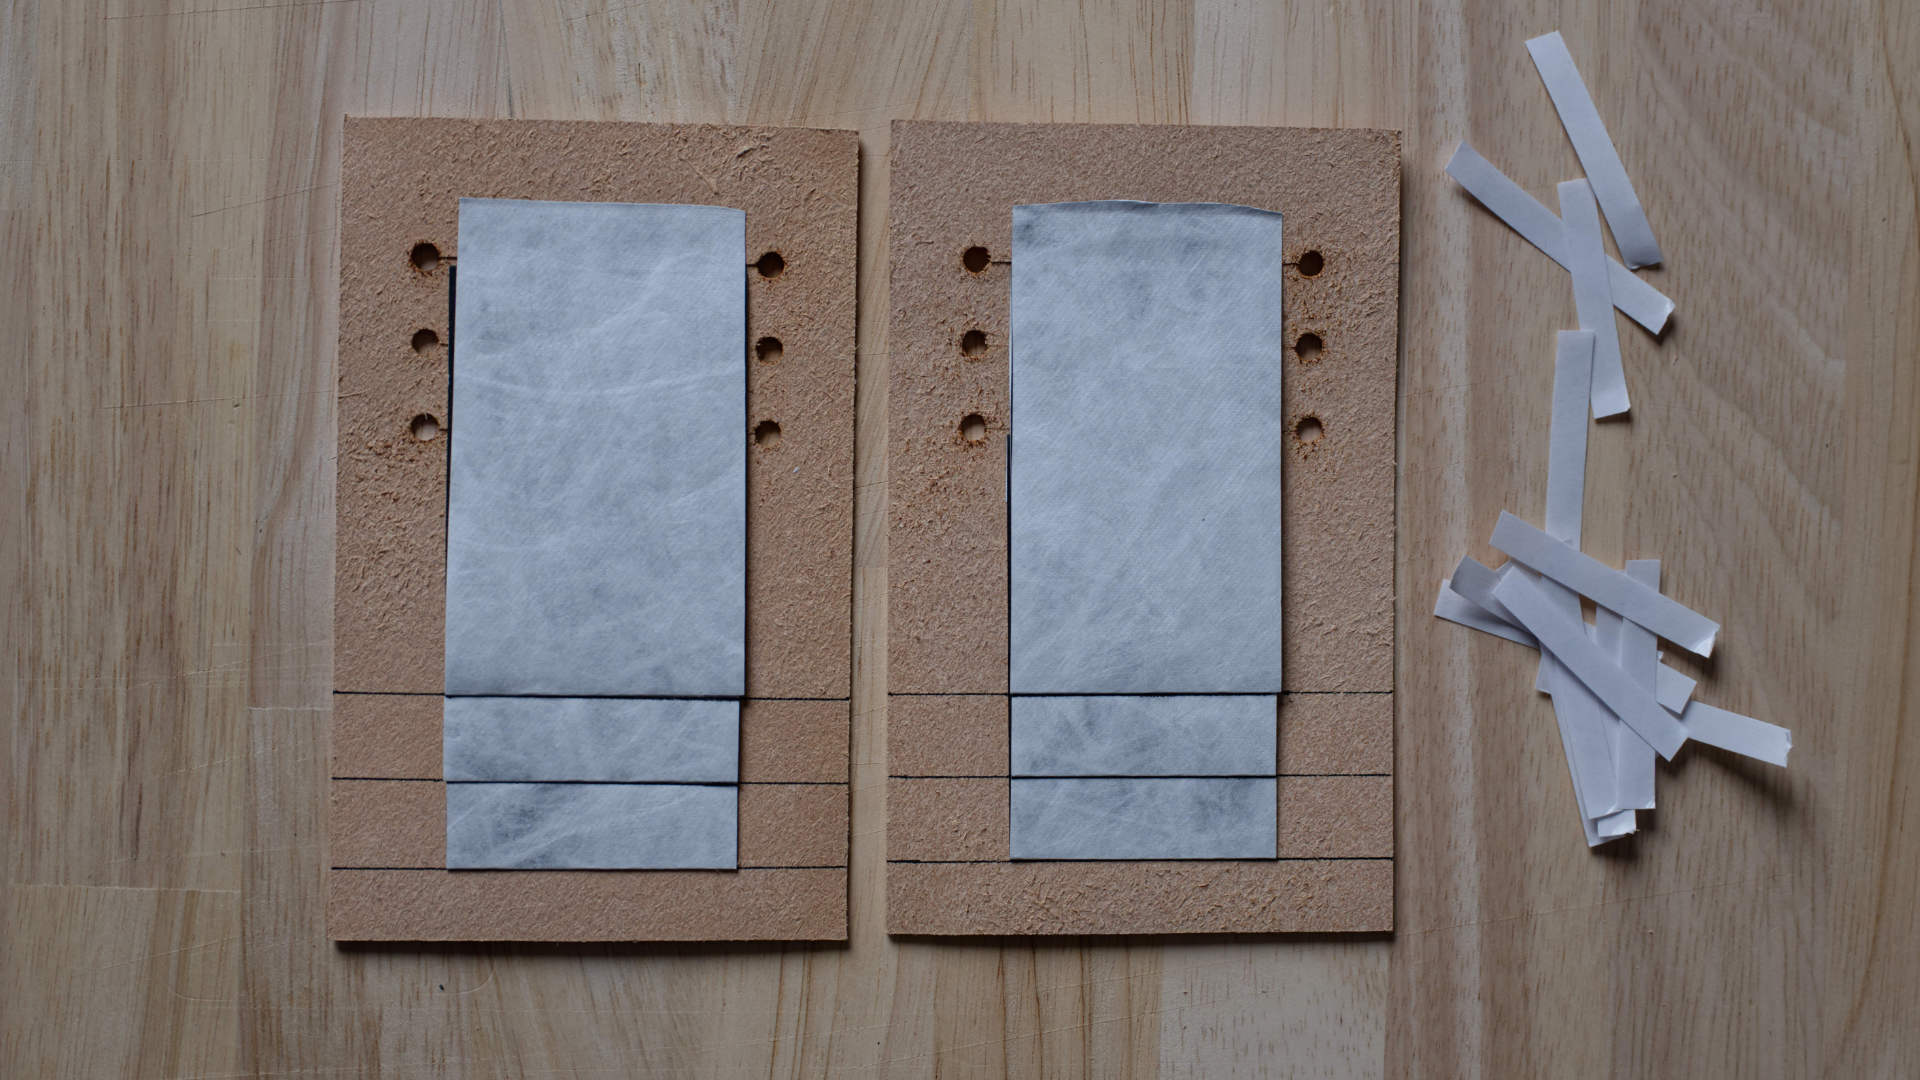
Step 11: Complete the second pocket
Repeat the above procedure by folding the material back, gluing to the back of the first pocket, and returning the fold to the bottom of the third pocket.

Step 12: Complete the third pocket
Repeat once more to form the third pocket.
Step 13: Form pockets on second panel
Repeat Steps 6-12 on the second card panel and snip off the remaining ribbon/Tyvek.
Step 14: Round corners of C1/C2 panels
The small C1/C2 panels will form the back of the card pockets. Before gluing and stitching, it's best to round off the corners on one side each.

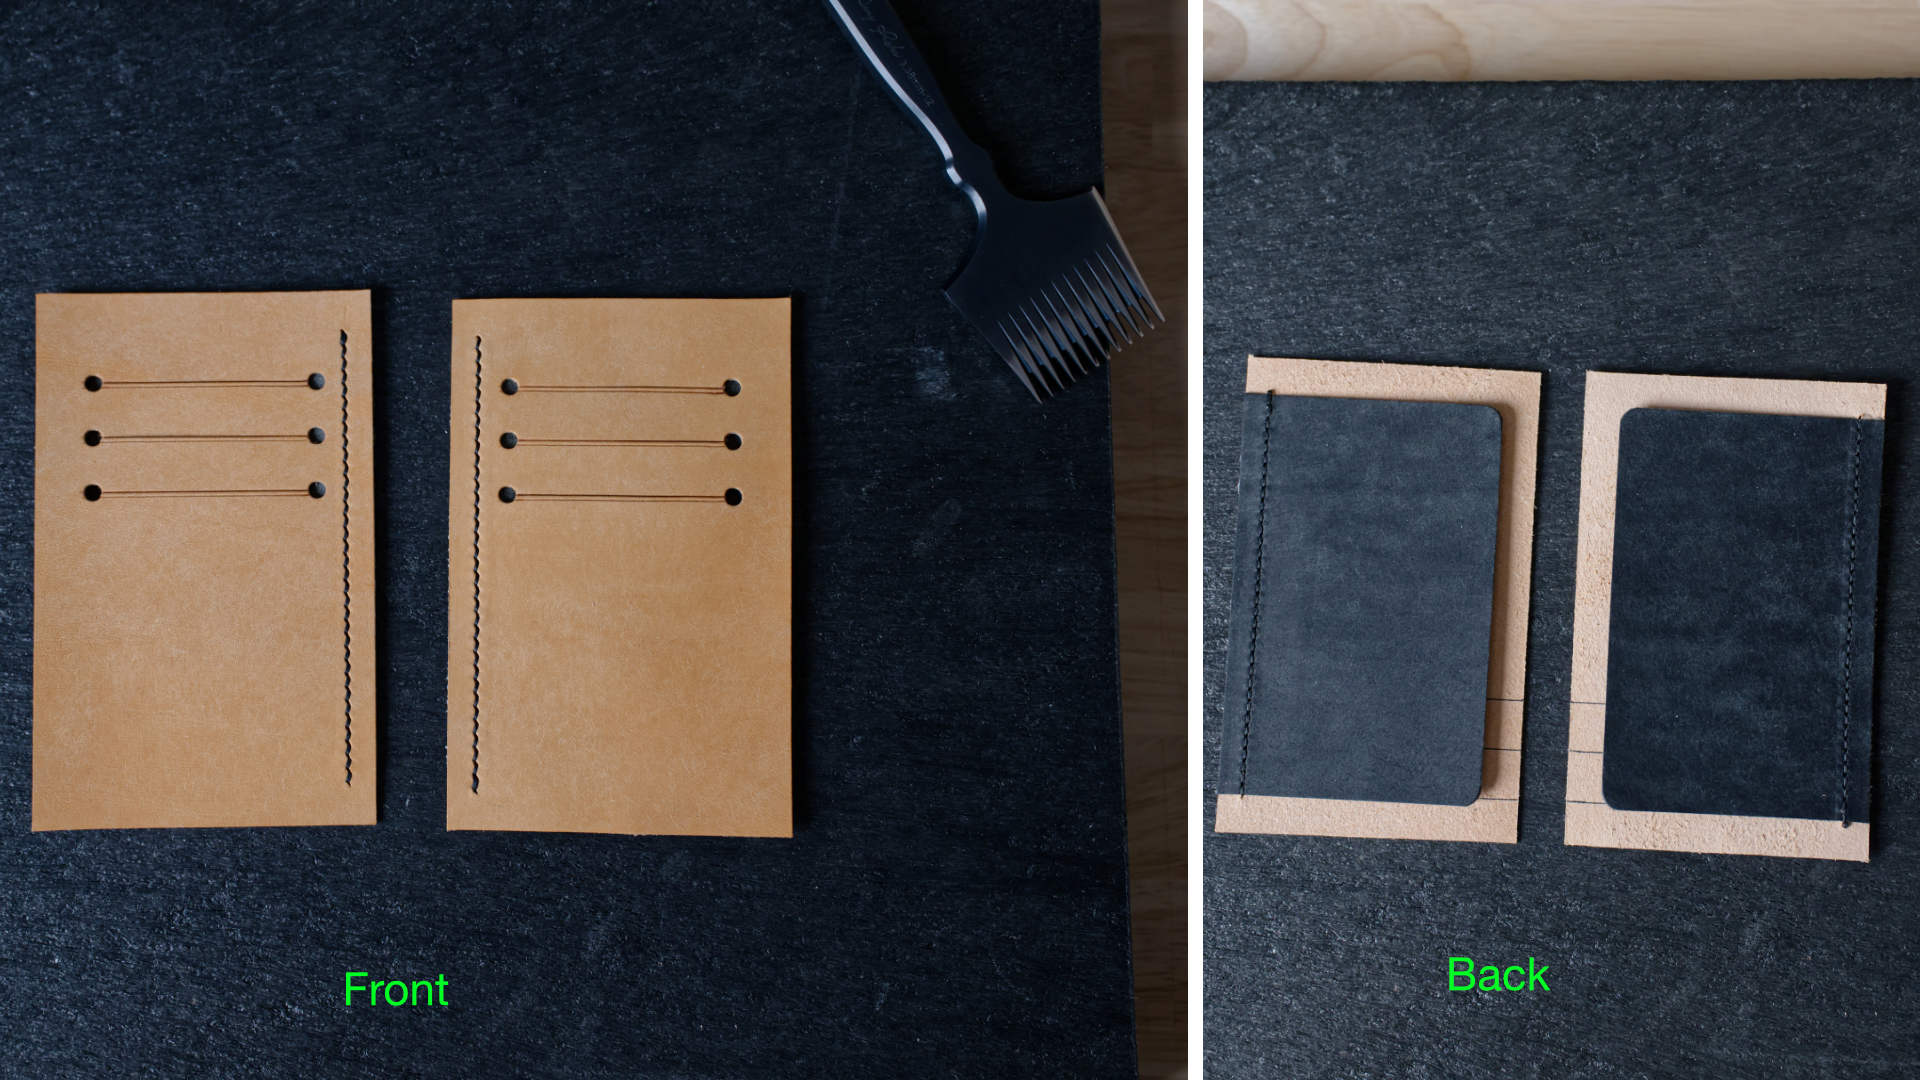
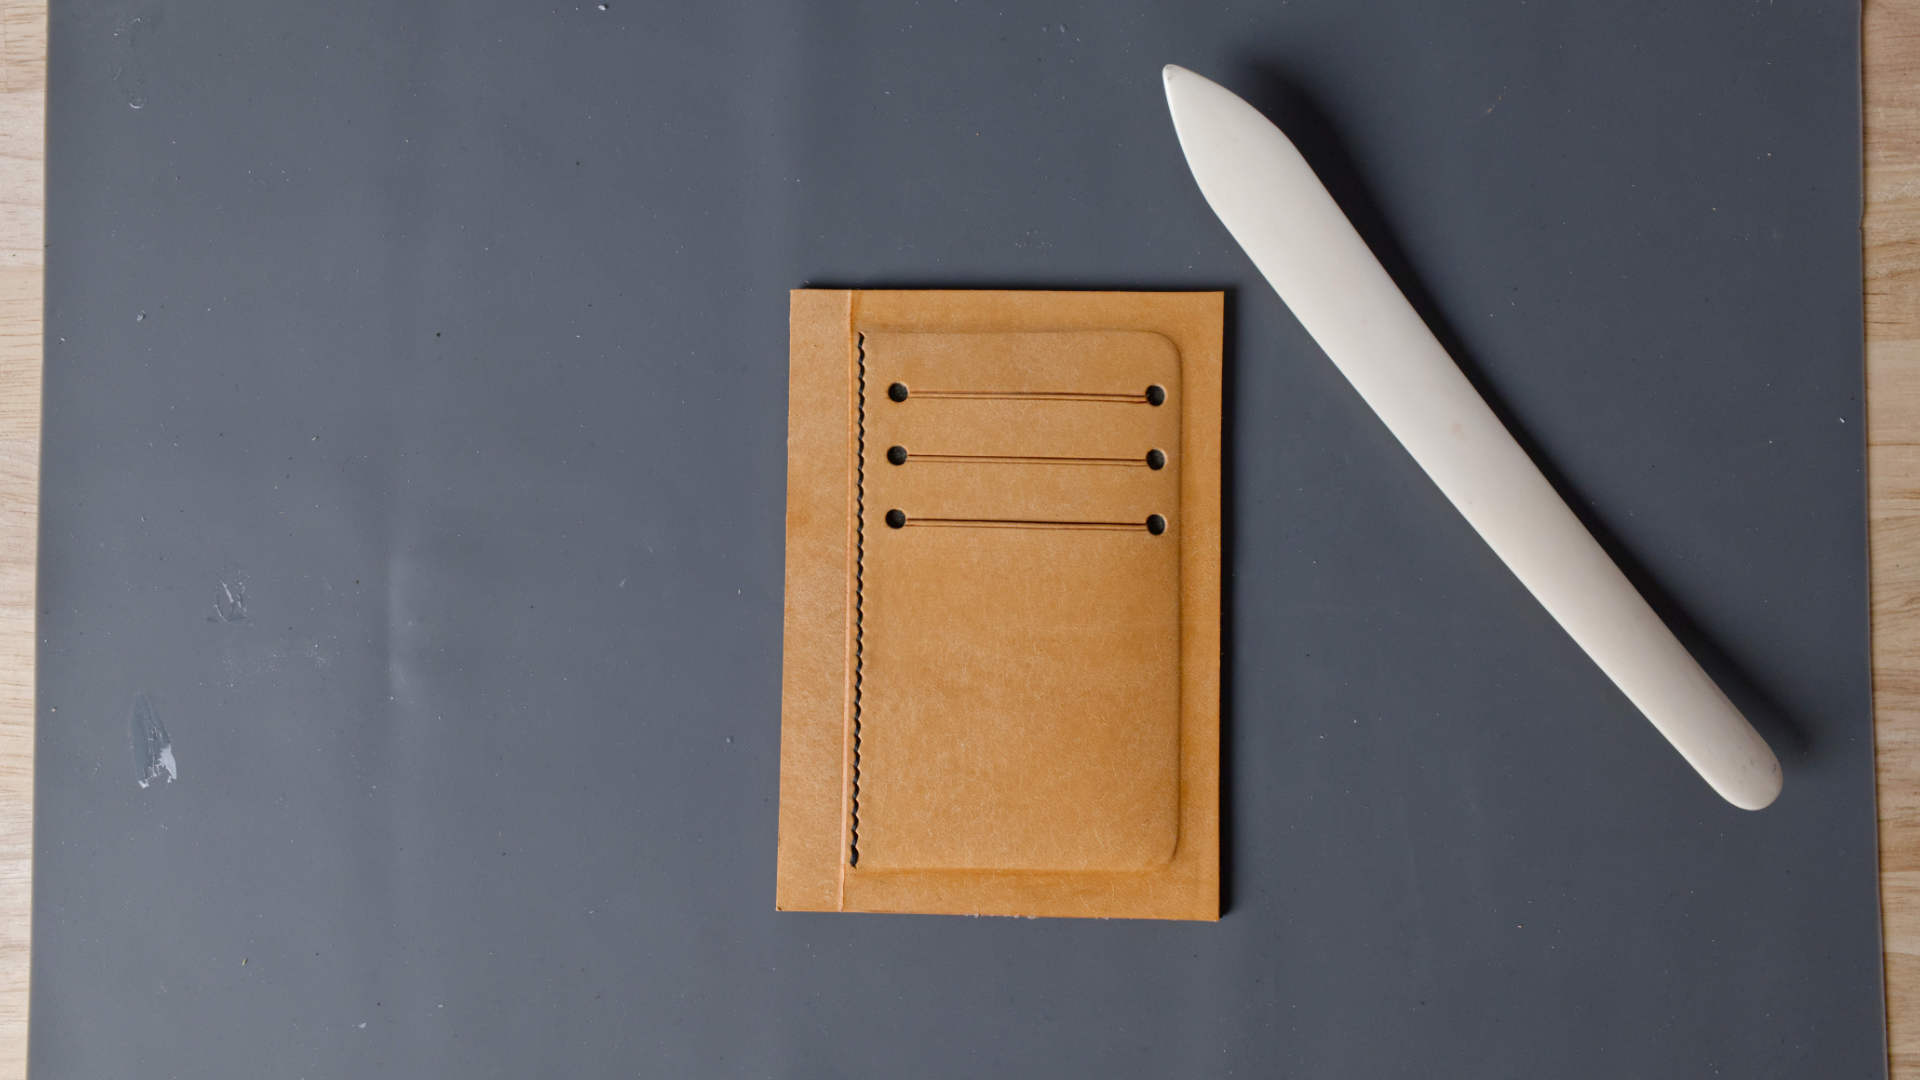
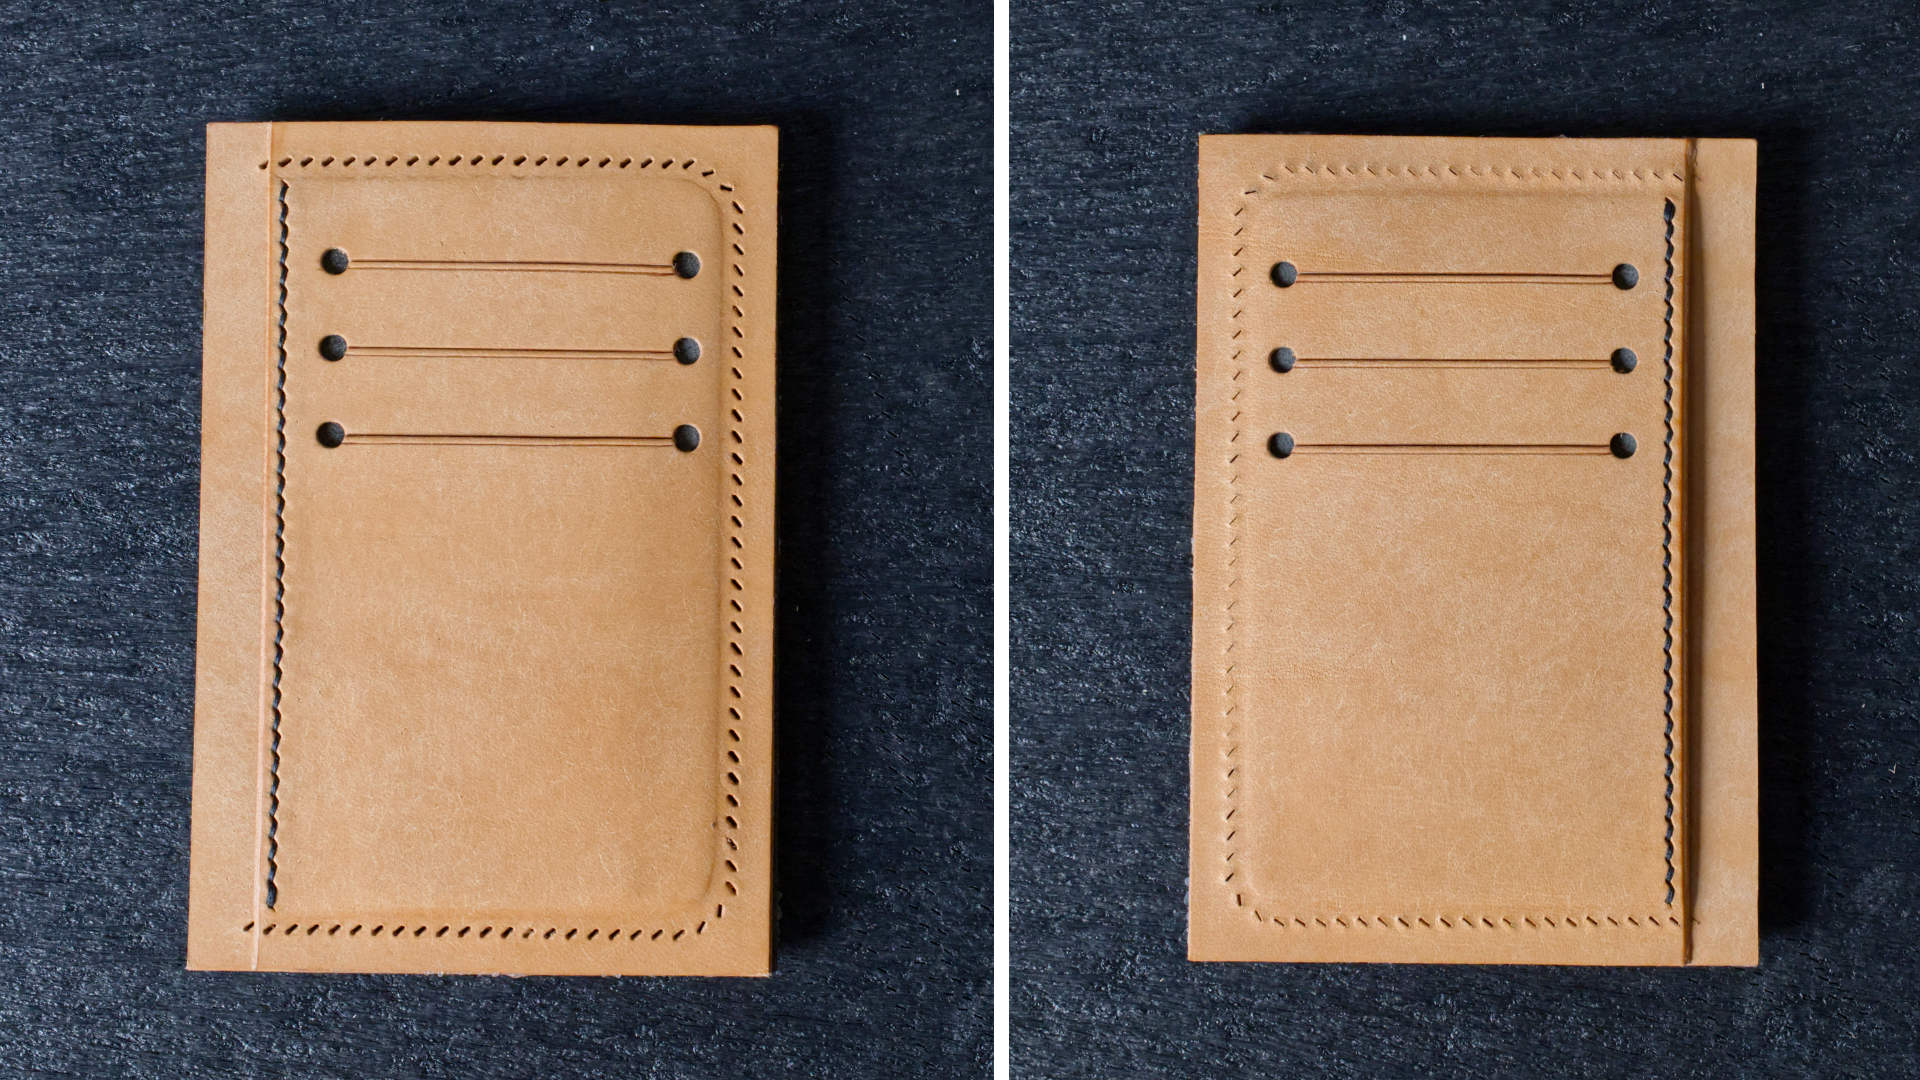
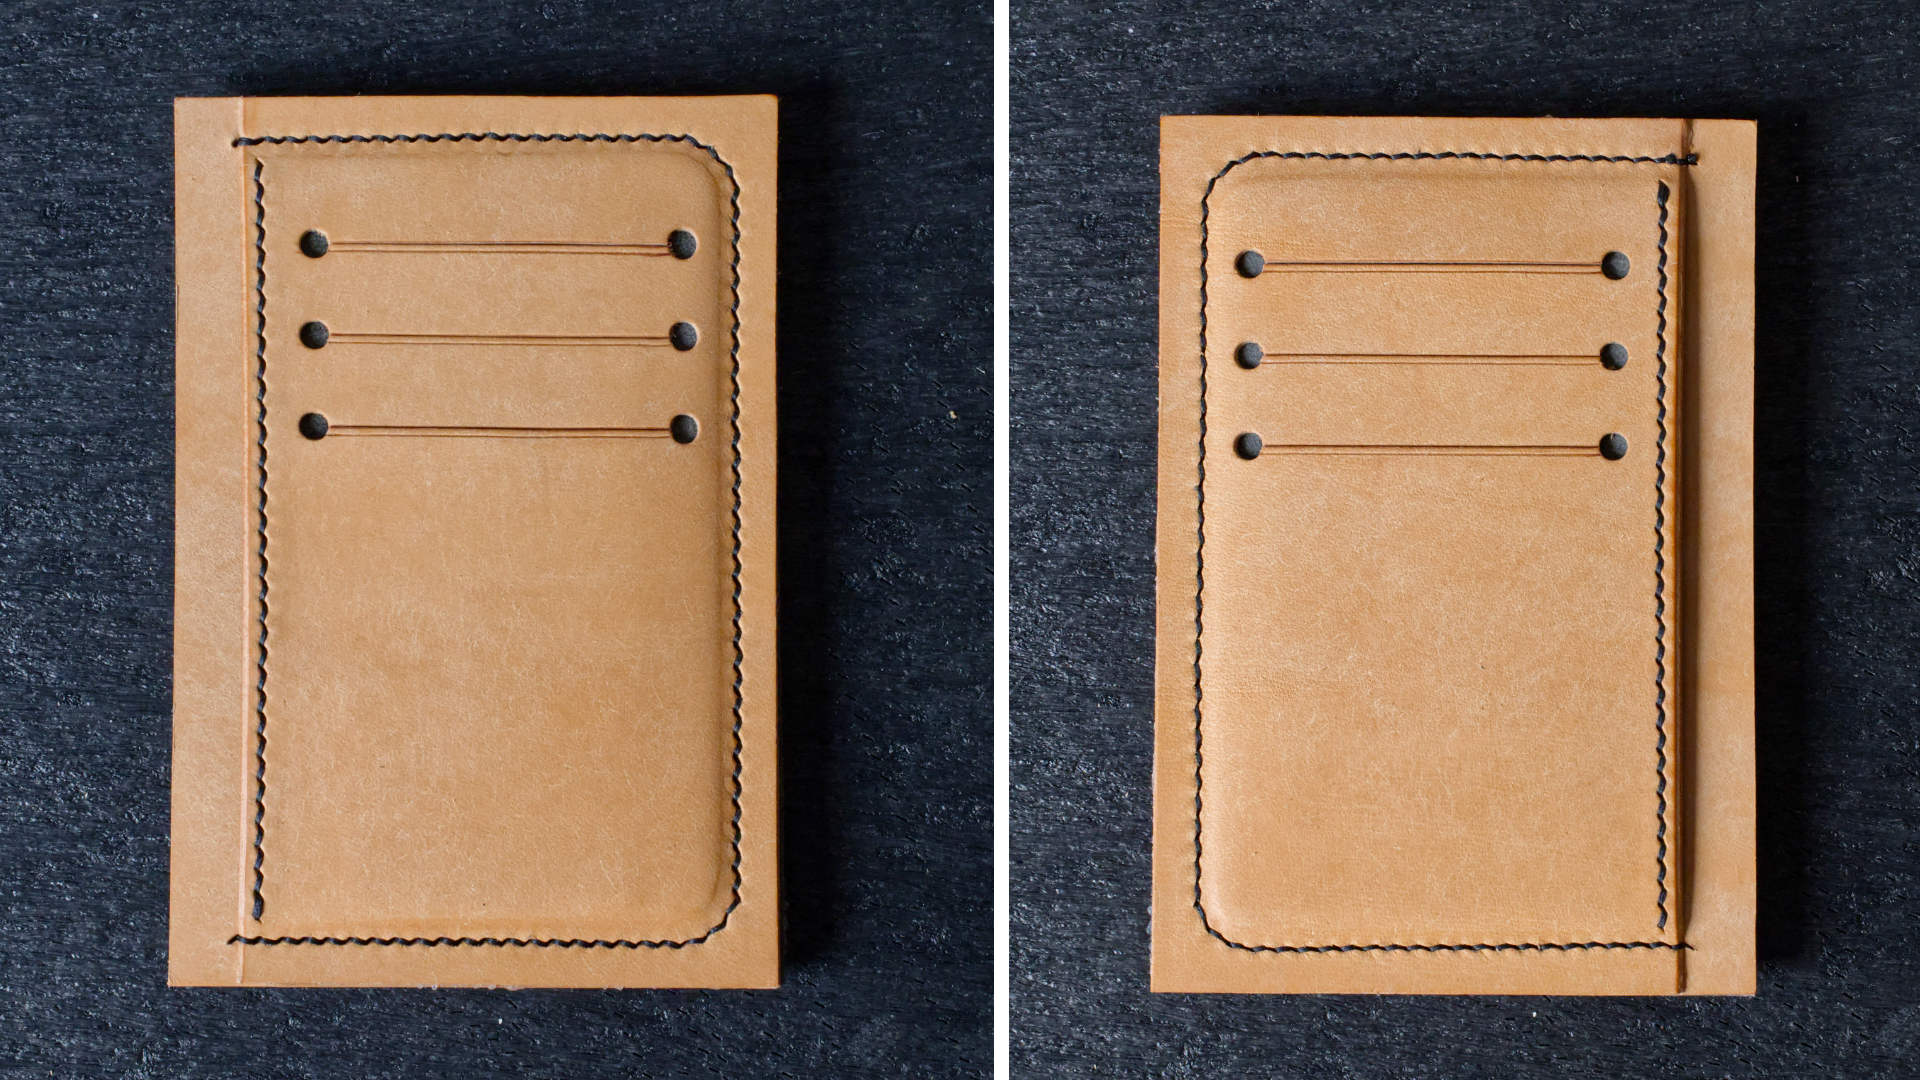
Step 15: Attach C1/C2 to B1/B2 panels
Glue and saddle stitch C1 to B1 and C2 to B2 as shown in the picture. Set your stitch line about 5mm away from the card slot holes, leaving plenty of room for trimming the edge.
Be sure the final panels are mirrored images to each other (i.e., stitch the left side of one panel and the right side of the other).
Stitch only as far as necessary to secure the C1/C2 panels.
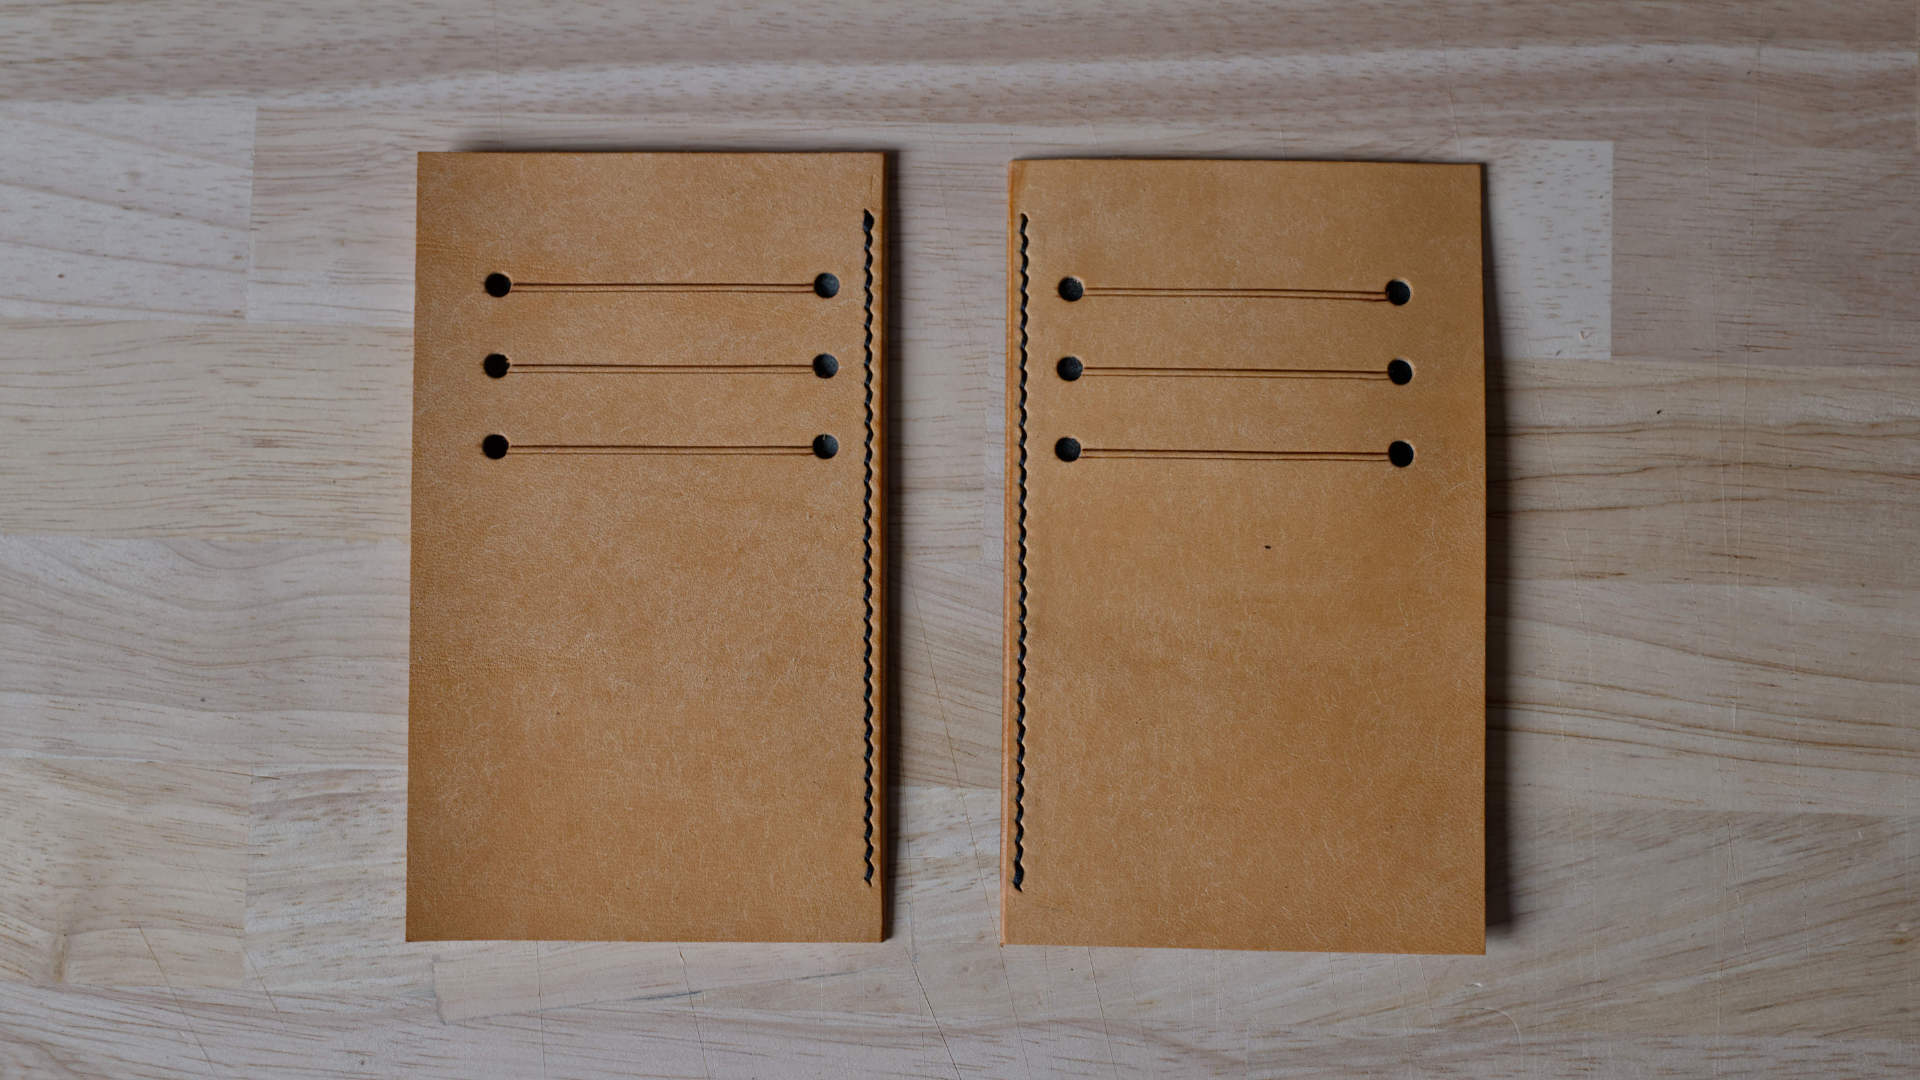
Step 16: Finish card panel edges
The stencil includes 1-2mm tolerances on all sides allowing us to trim the edge with a blade and straight edge.
After trimming, we can bevel, sand, and polish the edge. I used 3000 grit sandpaper, Tokonol, a burnisher, and a canvas cloth.
Do not round the corners yet.
Step 17: Begin cash pocket assembly
The next few steps do not necessarily have to be done in order. However, I've made around a dozen of these wallets and found that this order yields the cleanest stitch lines and final look.
First, take two A panels of opposite color and glue together with the grain side facing outward.
Take care around the edges. The case pocket opening will not have any stitching, so the glue does all of the work.
Step 18: Finish cash pocket assembly
Rough up three of the outer edges of each contrast color A piece (A3 and A4 in the Step 2 picture), then glue together forming the cash pocket (primary colored grain side facing outward).

Step 19: Glue one card pocket assembly
Glue one of the card pocket assemblies to the cash pocket, and use a pocket opener or creaser around the edges (you should see the outline of the C panel behind the B panel).
I strongly recommend against gluing the second card pocket assembly until after we have created our stitching holes.
After the glue has dried, you can trim the cash pocket opening (do not round the corners yet).
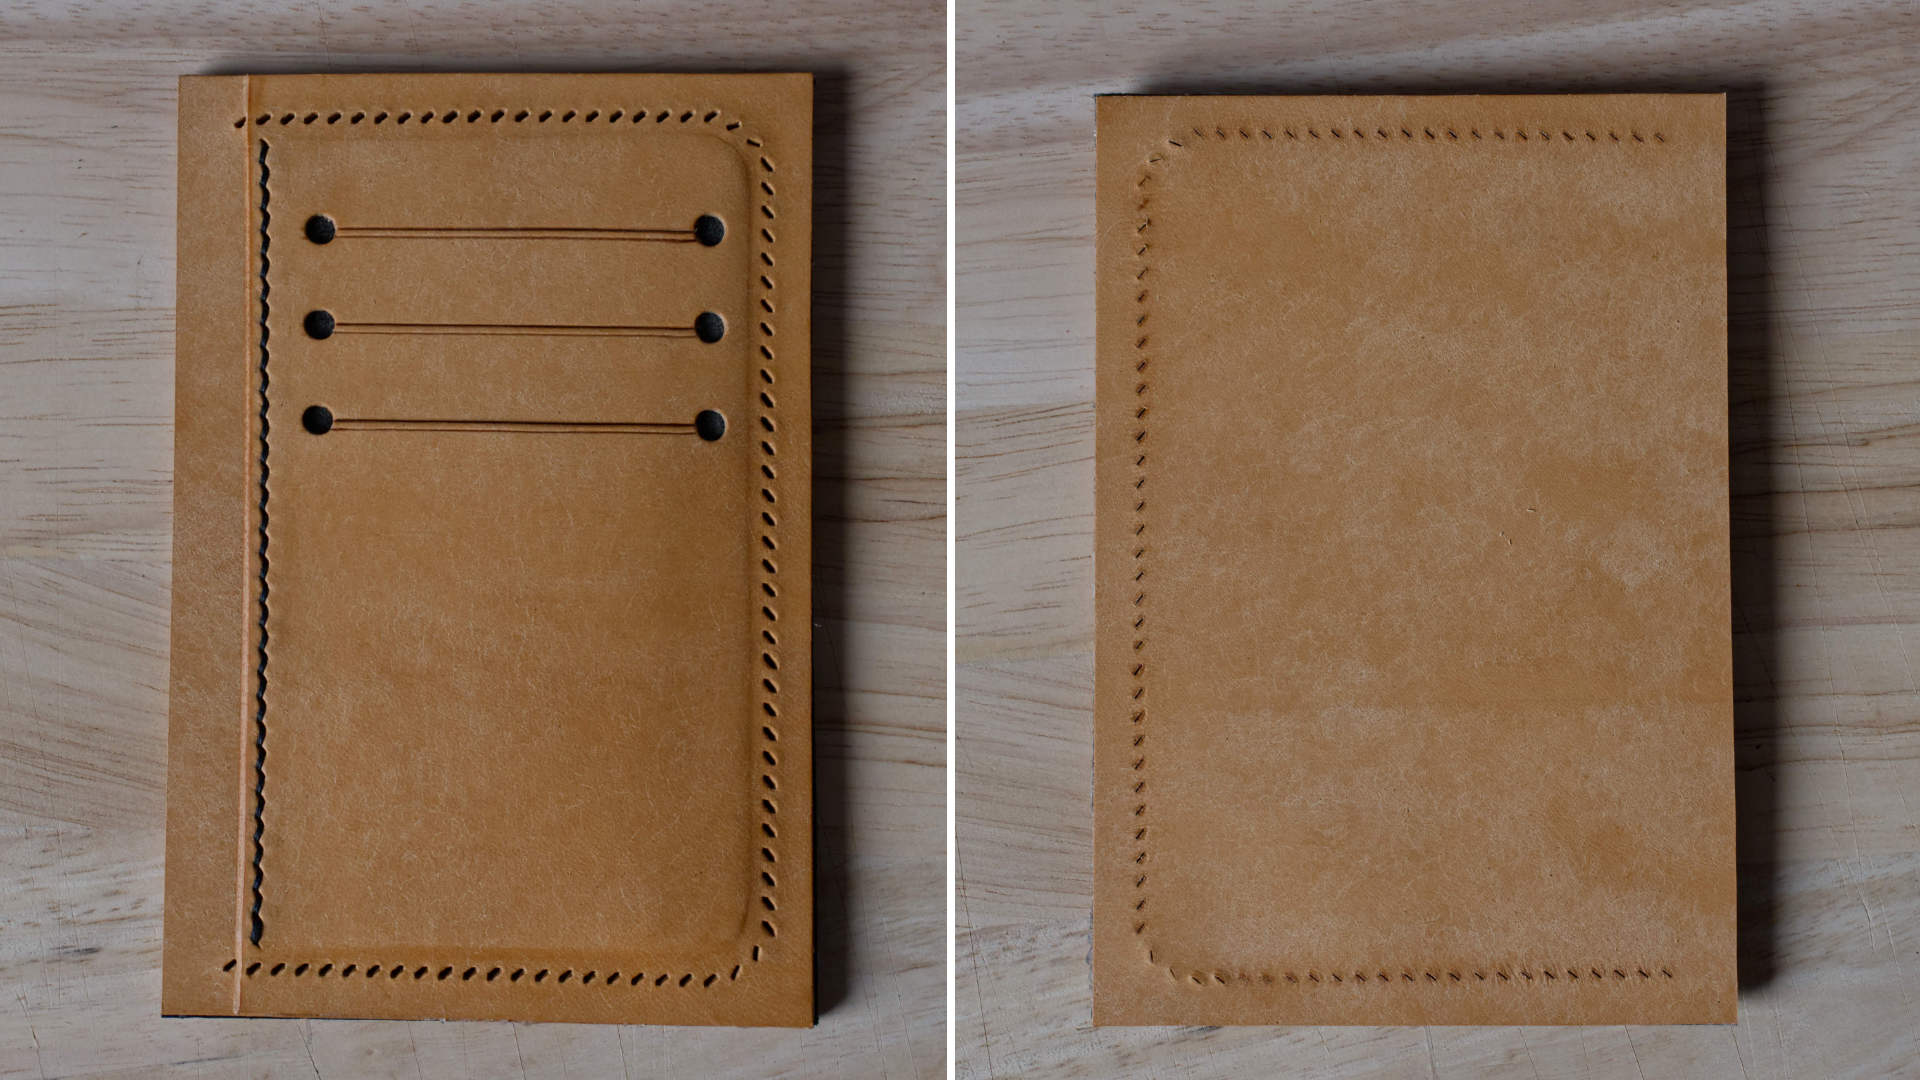
Step 20: Create stitching holes
This is a little unorthodox, but I have found that punching stitching holes through the final assembly often results in crooked lines on one side. This is because the edges are thinner than the mid-sections, so the leather has a tendency to curve downward when using pricking irons.
However, since we are punching the stitching holes before the final assembly, the back panel can lie completely flat (allowing straighter stitch lines).
Be sure to only create the stitching holes around the card pocket assembly, not the full assembly (i.e., not through the cash pocket opening).
Step 21: Glue the second card pocket assembly
Glue the second card pocket assembly and use the pocket opener/creaser as before.
Allow the glue to dry completely before proceeding.
Step 22: Add stitch holes to card assembly
Lay the final assembly with the stitch holes facing upward and a piece of scrap leather underneath the edge. Punch the stitching holes through both the final piece of the assembly and the scrap piece underneath.
The scrap piece should prevent the assembly from curving too much, and the pre-made stitching holes should keep the pricking irons straight as they puncture the remaining layer.
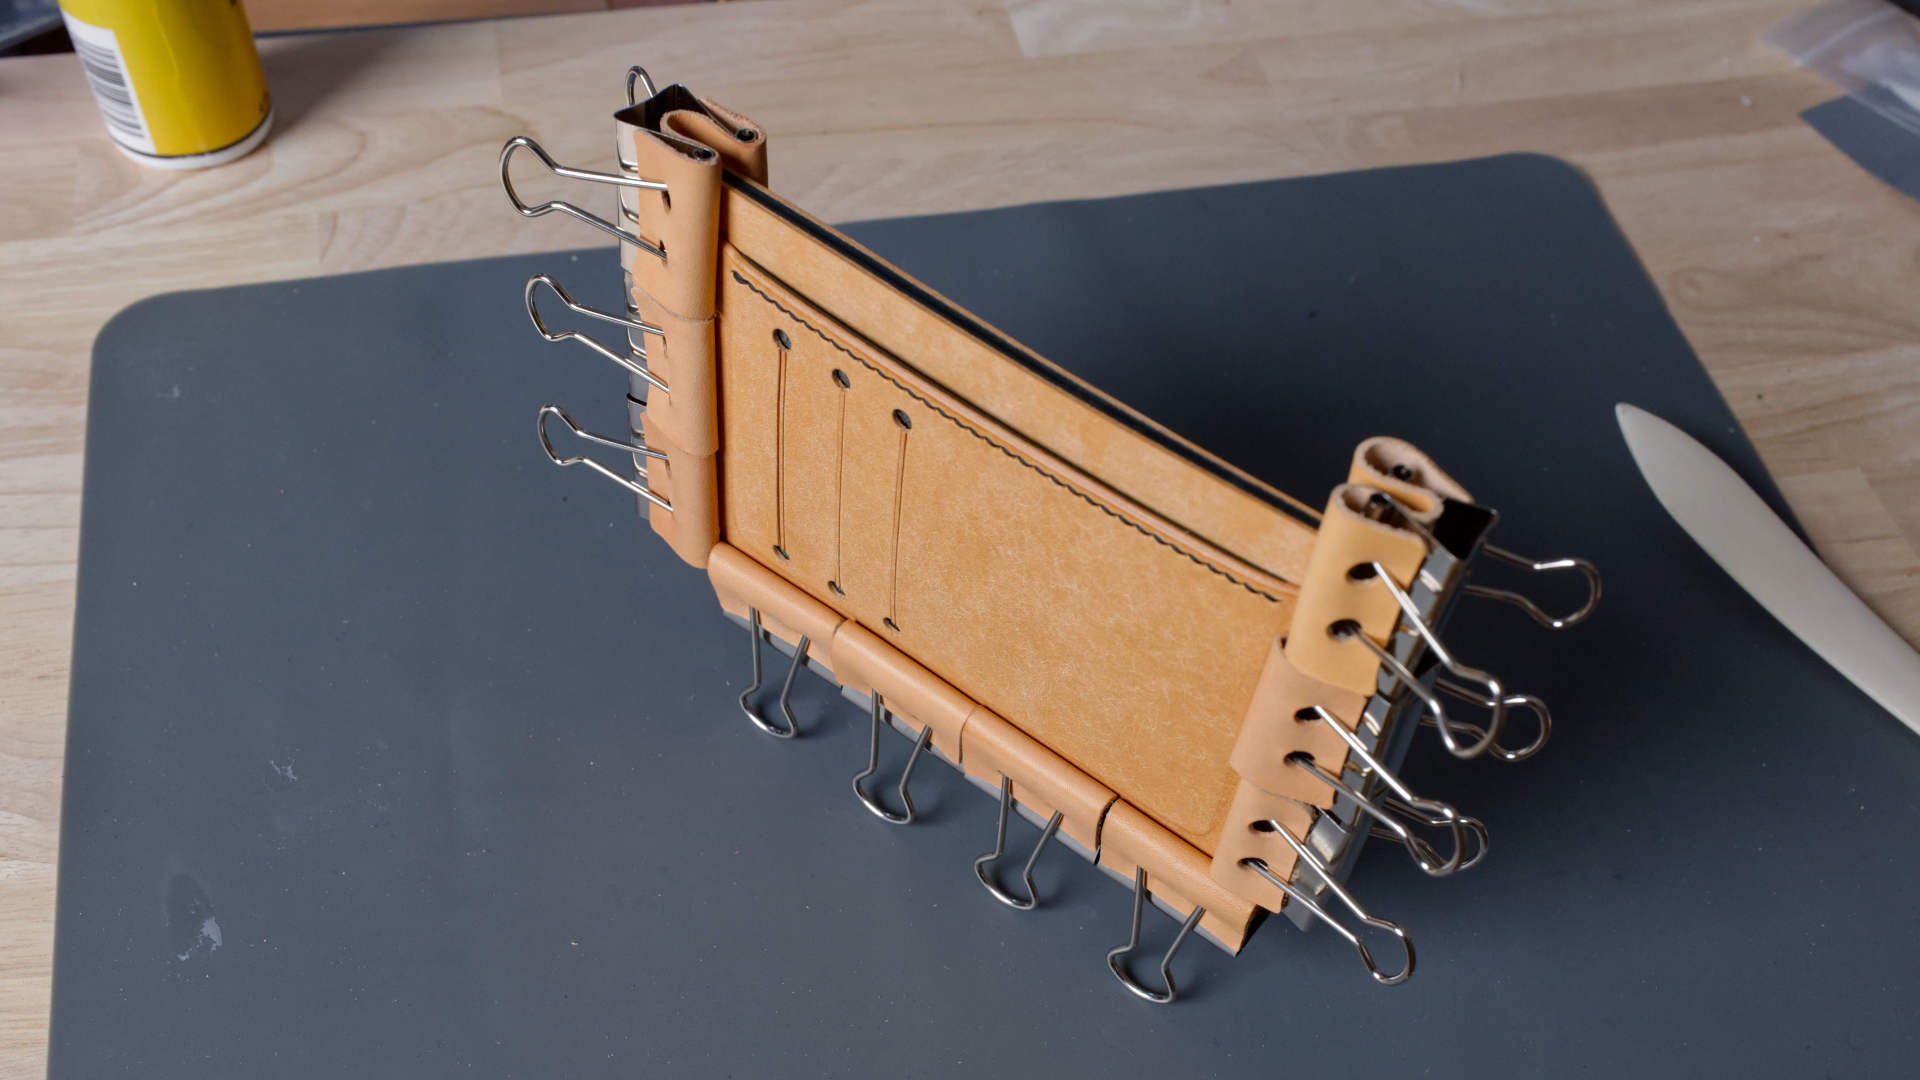
Step 23: Stitch the final assembly
I used a simple saddle stitch around the edges, just like the card pocket assembly stitch.
Step 24: Finish the edges
Finally, we can trim, sand, bevel, and polish the edges.
Trimming the edges is kind of a pain. As mentioned before, the thinner edges tend to curve downward.
The easiest way to prevent this is to use scrap leather under the edges and cut with a very sharp blade (applying only light pressure).
Perform this step very slowly and carefully. If you trim too much or trim unevenly, it can ruin the entire wallet.
After trimming and beveling the edges, you can add Tokonal and polish away.